How to Customize JupyterLab with Anaconda Environments
Open a Delta terminal (Open OnDemand shell or direct SSH).
Load
anaconda_<cpu, gpu, mi100>. (Pick which one you want to use as your base installation, the example usescpu.)[arnoldg@dt-login03 ~]$ module load anaconda3_cpu
Initialize your default login shell to use conda environments.
[arnoldg@dt-login03 ~]$ conda init bash
...
[arnoldg@dt-login03 ~]$ bash
(base) [arnoldg@dt-login03 ~]$
If you see error messages when you run
conda init bash, ctrl+c through them and continue. As long as conda added code to the end of your.bashrc(or similar for other shells), things will work properly.After you run
conda init bash, you will not need to loadanaconda3_cpu(orgpu) modules again. Just use your new custom environment.
Create your custom environment by making an empty environment or cloning your chosen environment or module (10 to 30 minutes). A few things to consider:
If you omit
--clone, your new environment will be mostly empty except for conda commands.You can customize the environment using conda and/or pip to install software (be sure to install Jupyter into the environment if not cloning).
A cloned environment will contain everything from base, so it can take up to 30 minutes to deploy.
Large conda installations may exceed your home directory size. This can be avoided by relocating your .conda directory to your project space, which has a larger quota than your home directory.
The example environment name is
mynewenv.(base) [arnoldg@dt-login03 ~]$ conda create --prefix /u/arnoldg/mynewenv --clone=base Collecting package metadata (current_repodata.json): done Solving environment: done ## Package Plan ## environment location: /u/arnoldg/mynewenv Proceed ([y]/n)? y Preparing transaction: done Verifying transaction: done Executing transaction: done # # To activate this environment, use # # $ conda activate /u/arnoldg/mynewenv # # To deactivate an active environment, use # # $ conda deactivateActivate the new environment.
(base) [arnoldg@dt-login03 ~]$ conda activate /u/arnoldg/mynewenv
(/u/arnoldg/mynewenv) [arnoldg@dt-login03 ~]$
Add your environment to the list of jupyter kernels available to jupyterlab and Open OnDemand.
The purpose of this step is to make sure your new environment kernel is added to
$HOME/.local, as shown. It will then appear along with the default Lmod modules that are loaded when Open OnDemand starts jupyterlab. Your $PATH should contain a jupyter-notebook by this step.(/u/arnoldg/mynewenv) [arnoldg@dt-login03 ~]$ which jupyter-notebook /u/arnoldg/mynewenv/bin/jupyter-notebook (/u/arnoldg/mynewenv) [arnoldg@dt-login03 ~]$ python -m ipykernel install --user --name mynewenv --display-name mynewenv Installed kernelspec mynewenv in /u/arnoldg/.local/share/jupyter/kernels/mynewenv (/u/arnoldg/mynewenv) [arnoldg@dt-login03 ~]$ jupyter kernelspec list Available kernels: python3 /u/arnoldg/.local/share/jupyter/kernels/python3 mynewenv /u/arnoldg/.local/share/jupyter/kernels/mynewenv
OPTIONAL
Note
If you want to keep the environment modifications with your default login environment, skip this step.
Restore your default environment with the following commands. You may repeat the steps above to add additional environment kernels to JupyterLab.
(/u/arnoldg/mynewenv) [arnoldg@dt-login03 ~]$ conda init --reverse
(/u/arnoldg/mynewenv) [arnoldg@dt-login03 ~]$ conda deactivate
(base) [arnoldg@dt-login03 ~]$ conda deactivate
[arnoldg@dt-login03 ~]$ module reset
Running "module reset". Resetting modules to system default. The following $MODULEPATH directories have been removed: None
[arnoldg@dt-login03 ~]$

# note that the default anaconda used by jupyterlab now contains your new kernel
[arnoldg@dt-login03 ~]$ module load python/anaconda3_cpu
[arnoldg@dt-login03 ~]$ jupyter kernelspec list
Available kernels:
mynewenv   /u/arnoldg/.local/share/jupyter/kernels/mynewenv
python3    /sw/user/python/anaconda3-pytorch-2.5.0/share/jupyter/kernels/python3
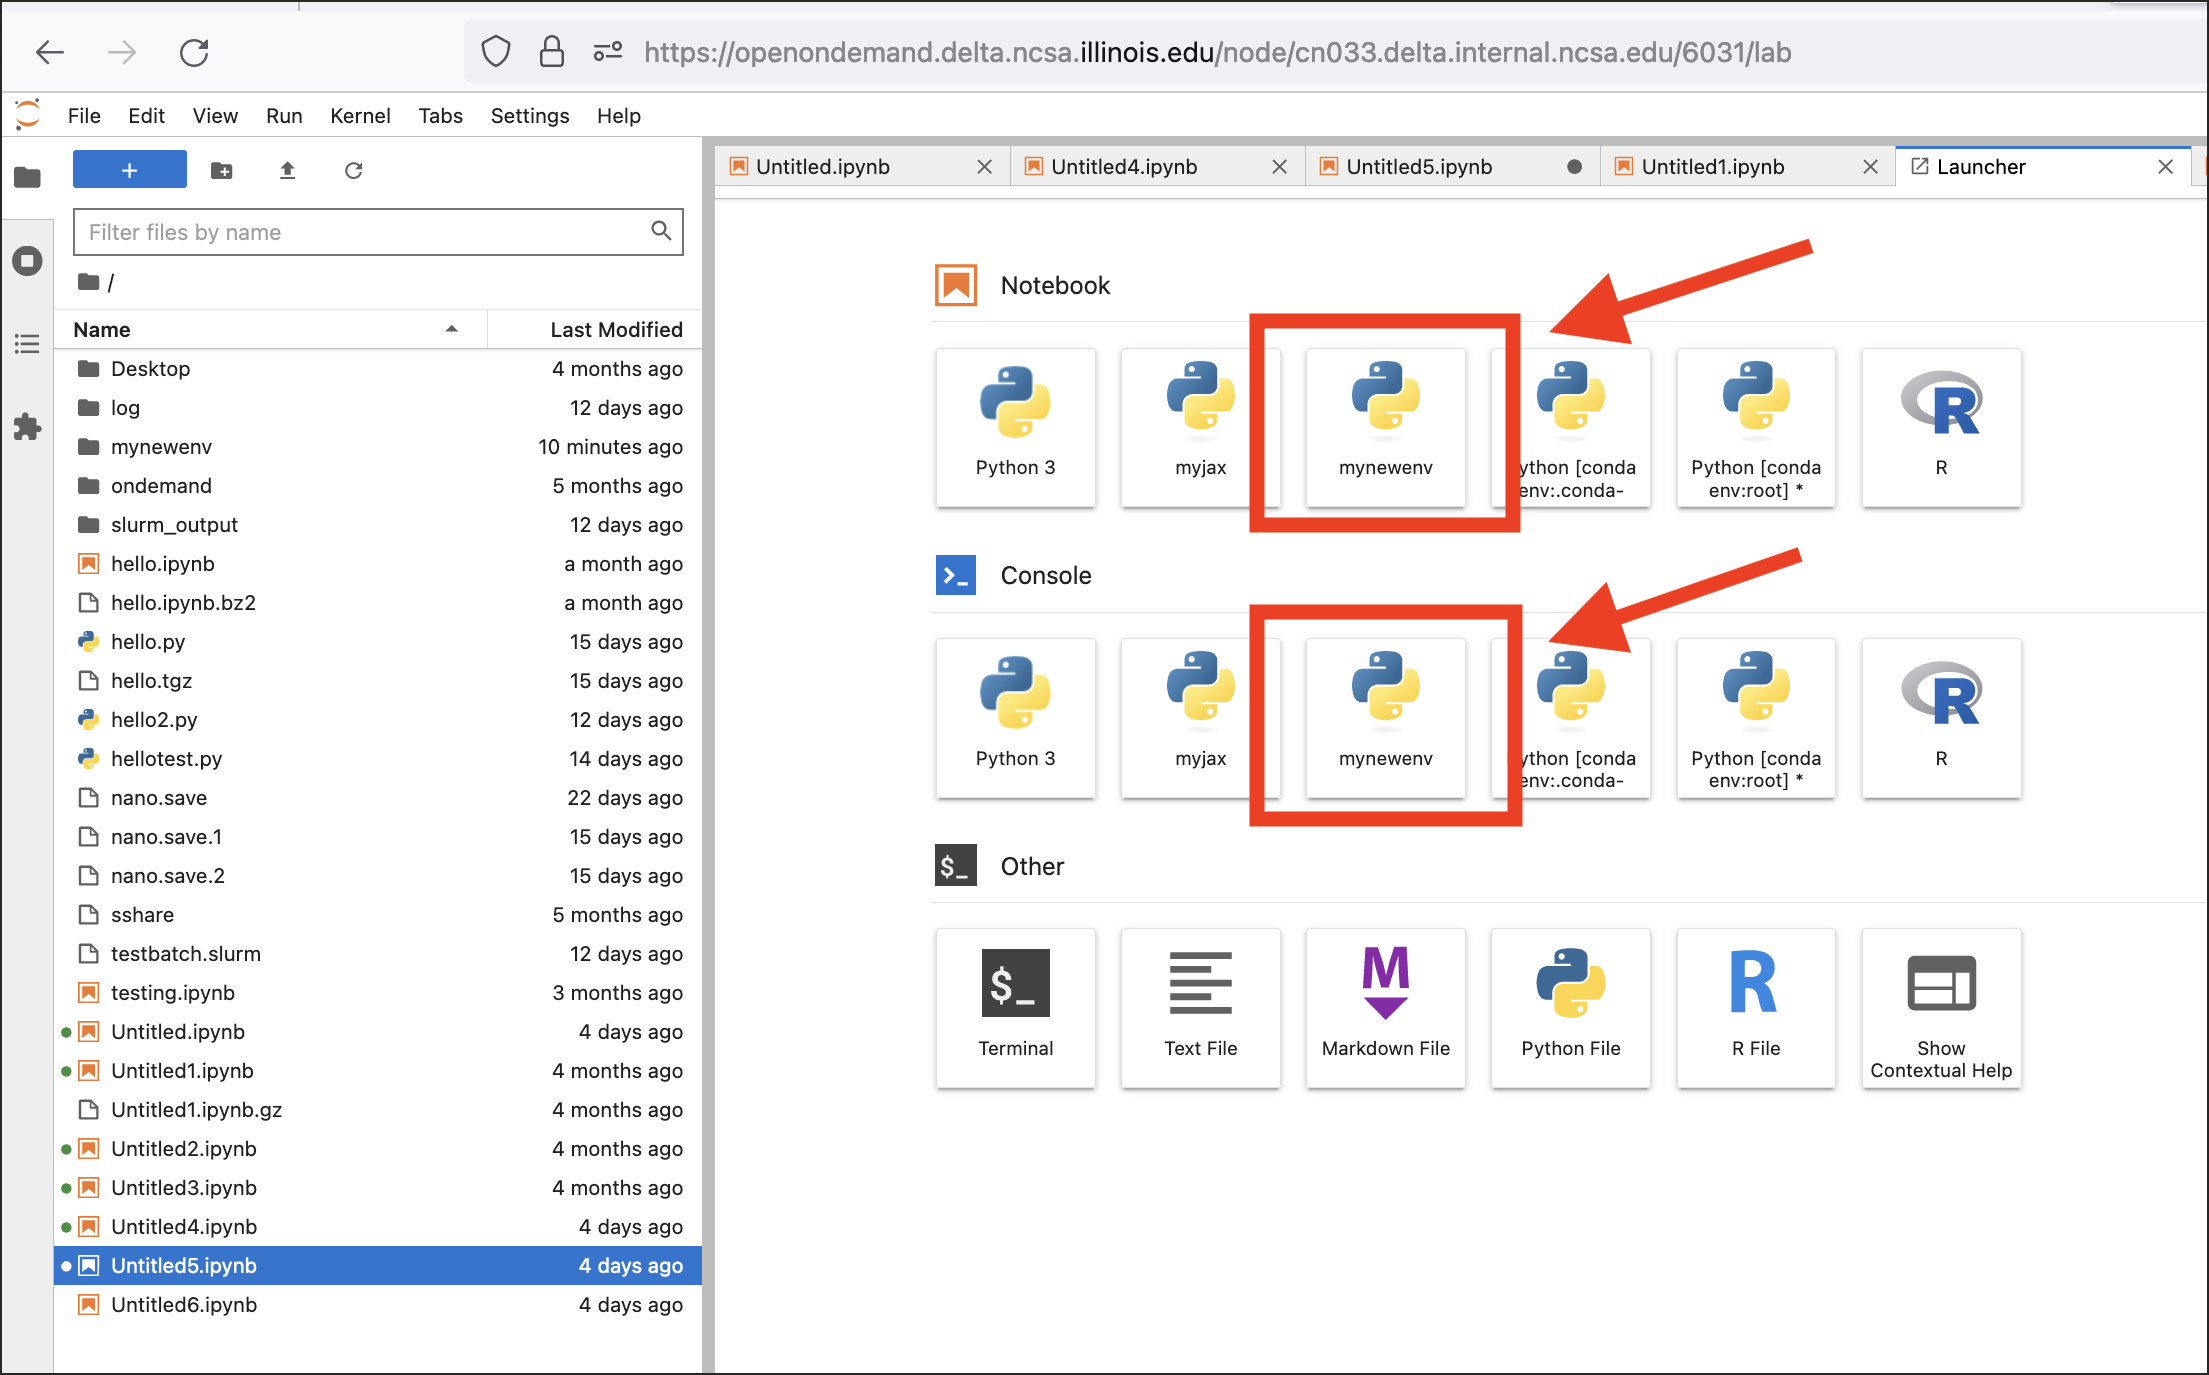
Start an Open OnDemand Jupyter session.
In JupyterLab, you can start a new notebook or console with the environment kernel you created. You can also change the kernel in an existing notebook or console from the Kernel menu (select Change Kernel).
