Desktop
Open OnDemand provides a VNC service (noVNC) through the “Desktop” Interactive App. Desktop runs in a job on a compute node and gives you access to a virtual Linux desktop that can provide a better graphics experience than X11.
Why use Desktop?
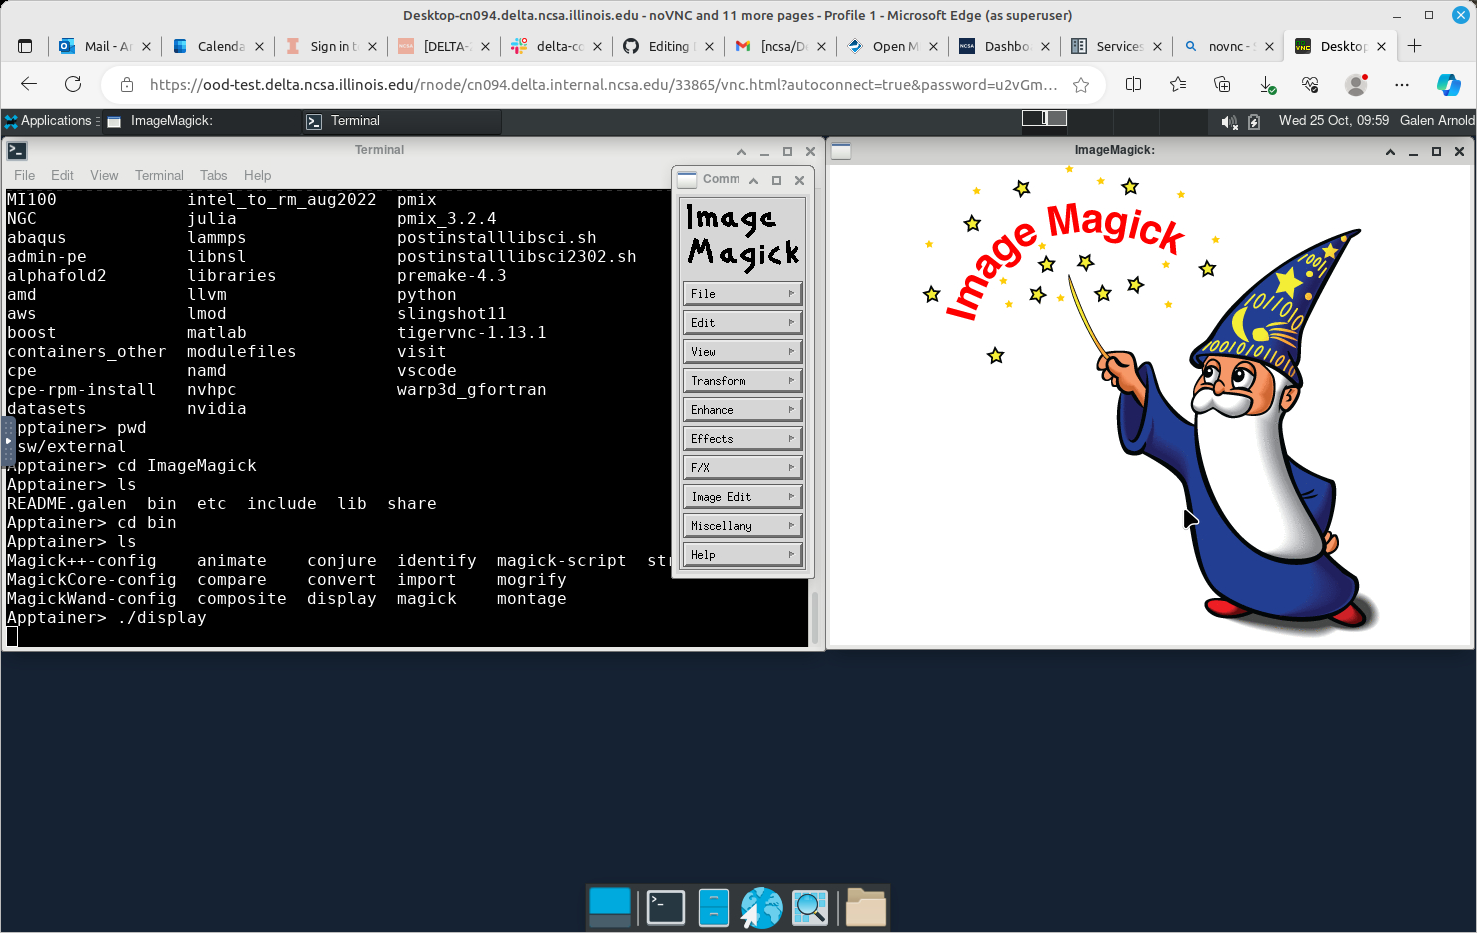
You need a GUI for a graphics package or third-party app that is GUI-only. For example, VisIt and ImageMagick.
You need a web browser on Delta to direct download to Delta or manage/setup a license for some software.
Elements to Keep in Mind
noVNC runs within a container that can see the Delta filesystems (
$HOME,/scratch,/projects,/sw). Delta modules are available from the container.You can navigate to a directory and manually launch applications that require a GUI.
You may need to set
PATHandLD_LIBRARY_PATHfrom some applications.Some applications may fail if the libraries required are not available in the container.
Due to space and time constraints, it’s not possible to build a container that represents all the software installed in
/sw. Consider a “some assembly required” approach if you run into issues trying to launch a program.Use
module show <foo>when logged into Delta via SSH or VS Code to discover the PATHs and environment settings you may need to include in the noVNC desktop.
How to Start an OOD Desktop Session
Navigate to the Open OnDemand dashboard.
Log in through CILogon with your NCSA username, password, and Duo MFA.
Open the Interactive Apps menu at the top of the window and click Desktop.
Fill out the form and then click Launch.
Container image to use - Select the container image you want to use from the menu.
Name of account - This must match one of your available Delta accounts (CPU or GPU, as appropriate); these are listed under
Projectwhen you run theaccountscommand on Delta.Partition - Match your partition type to the type of account you entered. (If your account ends in “cpu”, then your partition should start with “cpu”. If your account ends in “gpu”, then your partition should start with “gpu”.)
Duration of job - Select your duration following the format example in the form. Note the duration limit for interactive partitions.
Name of reservation - Leave empty if none.
Number of CPUs - Select the number of CPUs you want for the session.
Amount of RAM - Select your RAM following the format example in the form. Note the default RAM assigned if left blank.
Number of GPUs - Select the number of GPUs you want for the session. Note, you must select a GPU account and partition to use GPUs.
After you click Launch, you will be taken to My Interactive Sessions where you can view the status of your session.
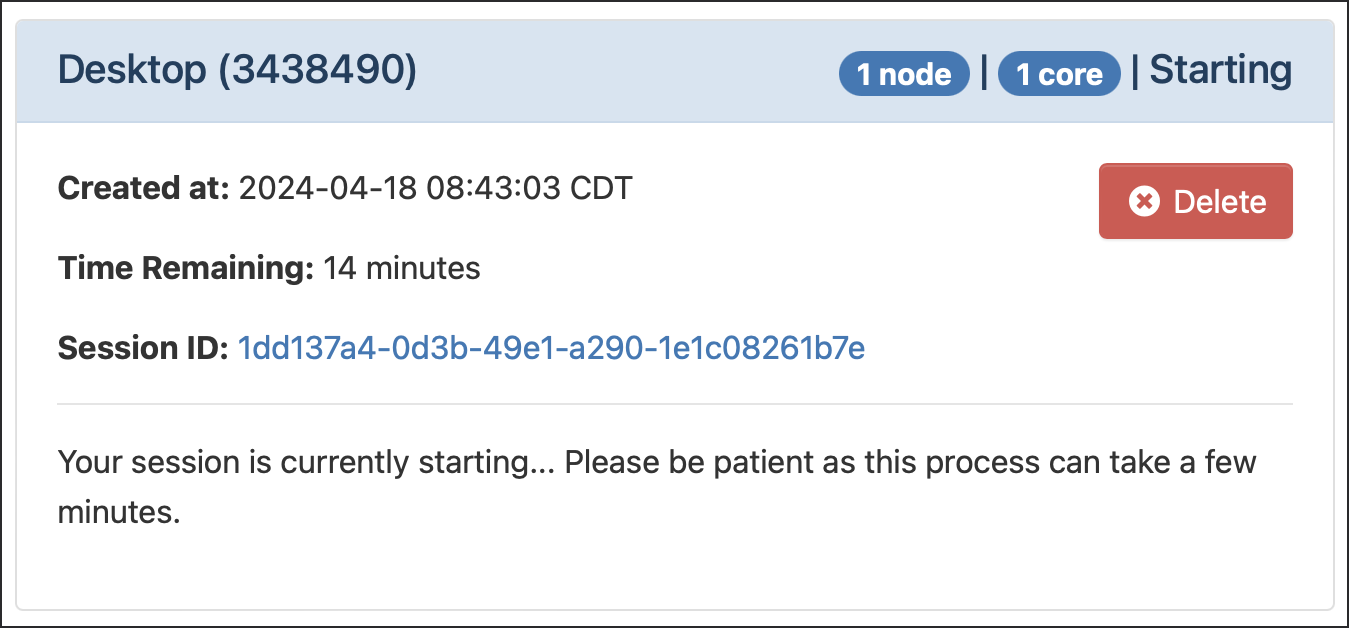
Once your session has started, click Connect to Desktop to launch your Desktop environment. Note, this may take a few minutes.
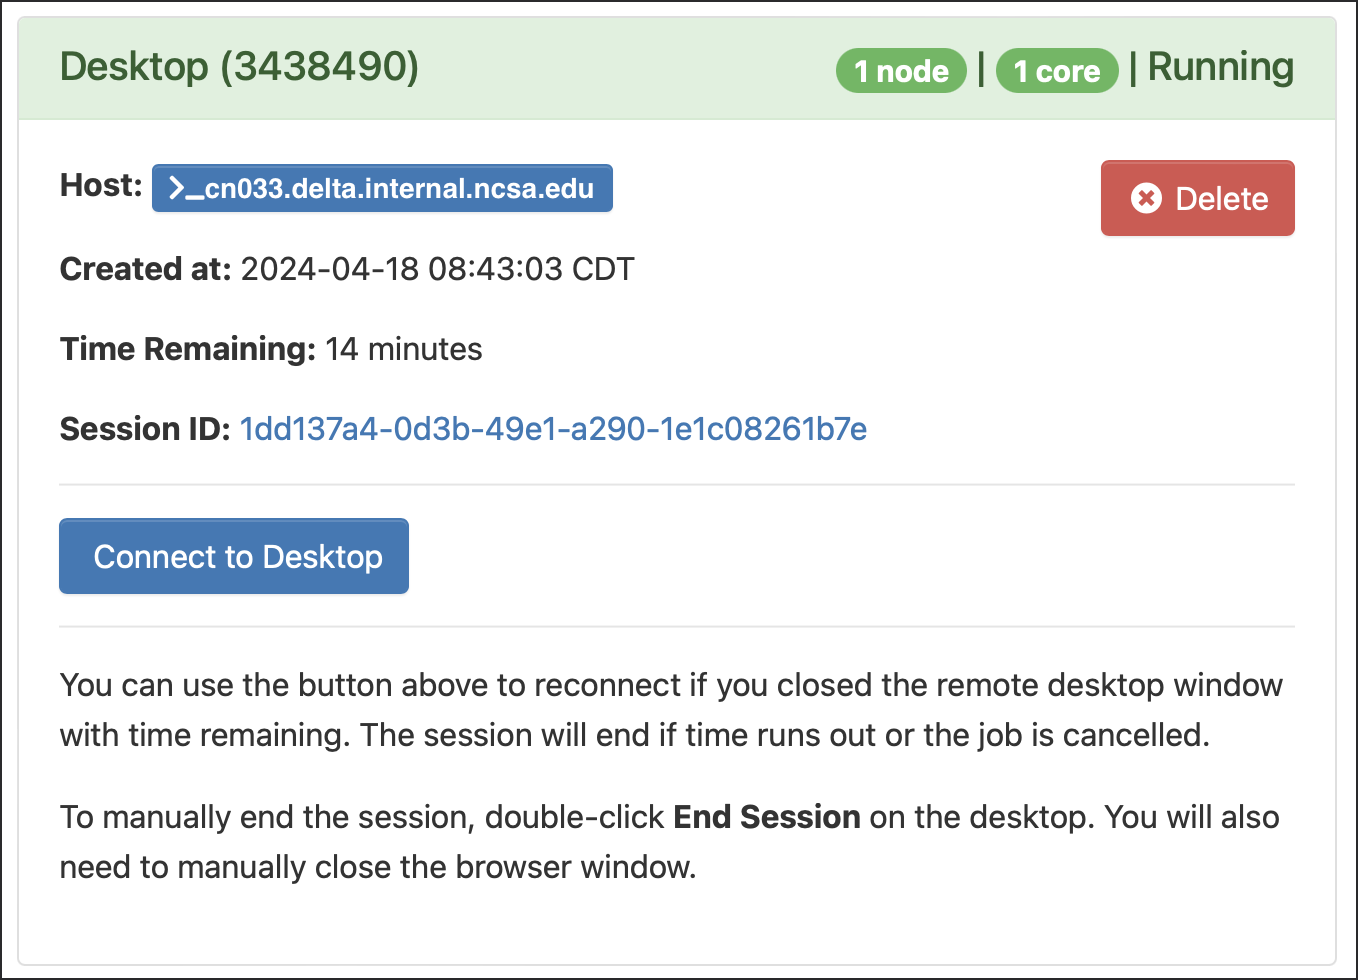
You are now in your Desktop environment on Delta. You can view the time remaining on your interactive sessions by clicking My Interactive Sessions in the Open OnDemand dashboard.

Recommended noVNC Settings
The Delta team recommends disabling compression for the best performance. Graphics performance will mostly depend on the graphics capabilities of your desktop computer. We have seen the best performance when using a gaming-style laptop with a discrete GPU.
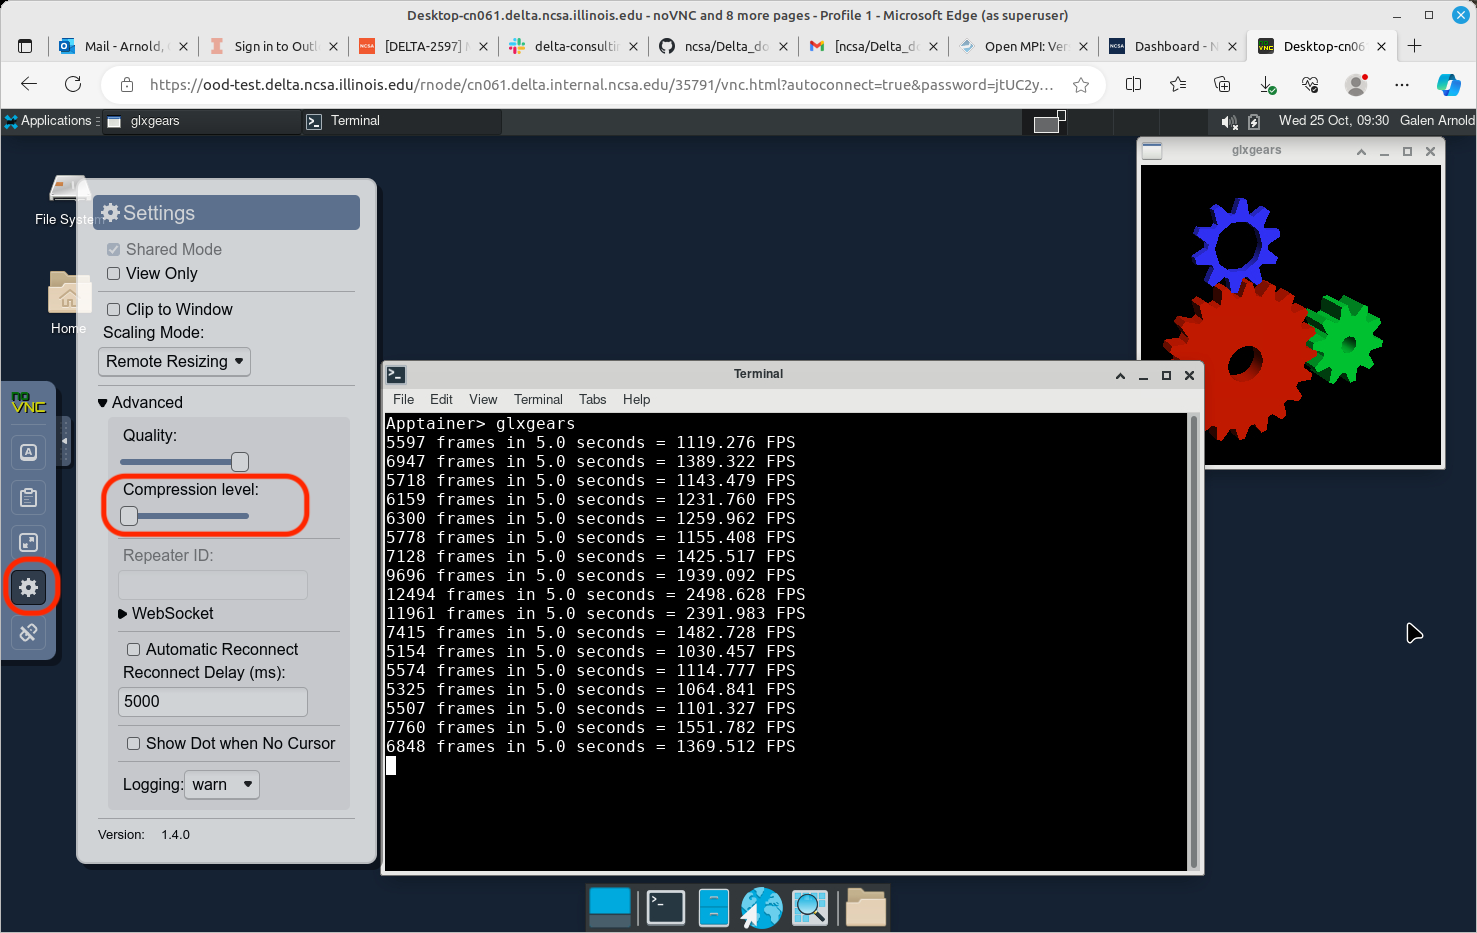
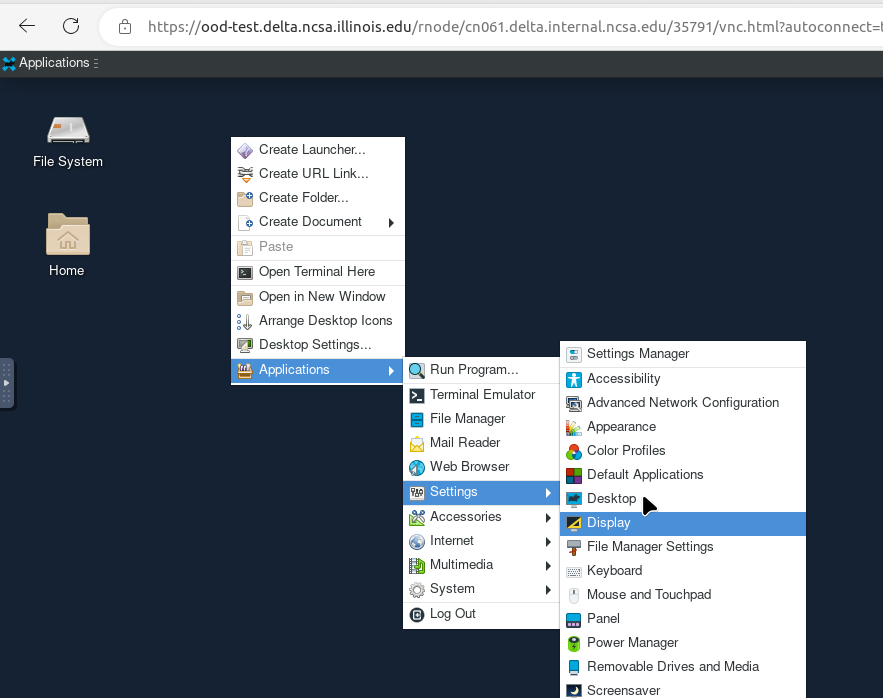
Adjust the display resolution to best fit your browser tab and local display in the Linux desktop display settings. Right-click on the desktop background and select Applications, then Settings, then Display.
ImageMagick Example
Here is an example showing ImageMagick running in OOD Desktop from /sw/external/ImageMagick/bin.
