Installed Software
Delta software is provisioned, when possible, using Spack to produce modules for use via the Lmod based module system. Select NVIDIA NGC containers are made available (see Containers) and are periodically updated from the NVIDIA NGC site. An automated list of available software can be found on the ACCESS website.
Modules/Lmod
Delta provides a set of modules and a variety of compilers. The default environment loads gcc and PrgEnv-gnu for CPU programs.
Modules supporting NVIDIA GPUs will contain “cuda” in the name of the module.
Unload cuda when building CPU-only packages to avoid accidentally linking cuda libraries.
Use module spider package_name to search for software in Lmod and see the steps to load it in your environment.
Module (Lmod) Command |
Example |
|---|---|
module list
Display the currently loaded modules. |
$ module list

Currently Loaded Modules:
1) PrgEnv-gnu  ...
|
module load <package_name>
Loads a package or metamodule such as cray-netcdf. |
$ module load
|
module spider <package_name>
Finds modules and displays the ways to load them. module -r spider "regular
expression"
|
$ module spider openblas

---------------------------------------------------------------------------
openblas: openblas/0.3.20
----------------------------------------------------------------------------
You will need to load all module(s) on any one of the lines below before the
"openblas/0.3.20" module is available to load.


   Help:
     OpenBLAS: An optimized BLAS library

$ module -r spider "^r$"

----------------------------------------------------------------------------
  r:
----------------------------------------------------------------------------
    Versions:
       r/4.1.
...
|
See also: User Guide for Lmod.
Please submit a support request for help with software not currently installed on the Delta system.
For single user or single project use cases the preference is for the user to use the Spack software package manager to install software locally against the system Spack installation. Delta support staff are available to provide limited assistance.
For general installation requests, the Delta project office will review requests for broad use and installation effort.
Python
Note
When submitting support requests for python, please provide the following and understand that Delta support staff time is a finite resource while python developments (new software and modules) are growing at nearly infinite velocity:
Python version or environment used (describe fully, with the commands needed to reproduce)
Error output or log from what went wrong (screenshots are more difficult to work with than text data)
Pertinent URLs describing what you were following/attempting (if applicable), note that URL recipes specific to vendors may be difficult to reproduce when not using their cloud resources (Google Colab, for example)
On Delta, you may install your own python software stacks, as needed.
There are choices when customizing your python setup. If you anticipate maintaining multiple python environments or installing many packages, you may want to target a filesystem with more quota space (not $HOME) for your environments. /scratch or /projects may be more appropriate in that case.
You may use any of these methods with any of the python versions or instances described below (or you may install your own python versions):
venv (python virtual environment)
Can name environments (metadata) and have multiple environments per python version or instance. pip installs are local to the environment. You specify the path when using venv:
python -m venv /path/to/env.conda (or miniconda) environments
Similar to venv but with more flexibility, see this comparison table. See also the miniconda environment option: anaconda or miniconda. pip and conda installs are local to the environment and the location defaults to
$HOME/.conda. You can override the default location in$HOMEwith the--prefixsyntax:conda create --prefix /path/to/env. You can also relocate your .conda directory to your project space, which has a larger quota than your home directory.pip3:
pip3 install --user <python_package>CAUTION: Python modules installed this way into your
$HOME/.local/will match on python versions. This can create incompatibilities between containers or python venv or conda environments when they have a common python version number. You can work around this by using the PYTHONUSERBASE environment variable. That will also allow for shared pip installs if you choose a group-shared directory.conda-env-mod: conda-env-mod lmod module generator from Purdue
The conda-env-mod script will generate a python module you can load or share with your team. This makes it simpler to manage multiple python scenarios that you can activate and deactivate with module commands.
Examples using all the above are shown in the Intel scikit-learn-intelex repository (an Intel accelerated scikit learn subset library for x86_64 architecture).
pyenv: pyenv python version management
Pyenv helps you manage multiple python versions. You can also use more than one python version at once in a project using pyenv.
Note
The NVIDIA NGC Containers on Delta provide optimized python frameworks built for Delta’s A100 and A40 GPUs. Delta staff recommend using an NGC container when possible with the GPU nodes (or use the anaconda3_gpu module).
The default GCC (latest version) programming environment contains:
Python (a recent or latest version)
If you don’t need all the extra modules provided by conda-forge, use the basic python installation under the gcc module.
You can add modules via pip3 install --user <modulename>, setup virtual environments, and customize, as needed, for your workflow starting from a smaller installed base of python than Anaconda.
$ module load gcc python
$ which python
/sw/spack/deltas11-2023-03/apps/linux-rhel8-zen3/gcc-11.4.0/python-3.12.1-ahcgi2c/bin/python
List of modules available in python from pip3 list:
Package            Version
------------------ ---------
certifi            2021.10.8
cffi               1.15.0
charset-normalizer 2.0.12
click              8.1.2
cryptography       36.0.2
globus-cli         3.4.0
globus-sdk         3.5.0
idna               3.3
jmespath           0.10.0
pip                22.0.4
pycparser          2.21
PyJWT              2.3.0
requests           2.27.1
setuptools         58.1.0
urllib3            1.26.9
Miniforge conda modules
$ module spider conda

------------------------------------------------------------------------------------------------------------------------------------------
  pytorch-conda: pytorch-conda/2.8
------------------------------------------------------------------------------------------------------------------------------------------

This module can be loaded directly: module load pytorch-conda/2.8

------------------------------------------------------------------------------------------------------------------------------------------
  tensorflow-conda: tensorflow-conda/2.18
------------------------------------------------------------------------------------------------------------------------------------------

This module can be loaded directly: module load tensorflow-conda/2.18
A sample TensorFlow test script:
#!/bin/bash
#SBATCH --mem=64g
#SBATCH --nodes=1
#SBATCH --ntasks-per-node=1
#SBATCH --cpus-per-task=16     # <- match to OMP_NUM_THREADS
#SBATCH --partition=gpuA100x4-interactive
#SBATCH --time=00:10:00
#SBATCH --account=account_name    # <- match to a "Project" returned by the "accounts" command
#SBATCH --job-name=tf
### GPU options ###
#SBATCH --gpus-per-node=1
#SBATCH --gpus-per-task=1
#SBATCH --gpu-bind=verbose,per_task:1
###SBATCH --gpu-bind=none     # <- or closest

# expert mode only, most users will not purge all modules
# module purge # drop modules and explicitly load the ones needed, including cuda
               # (good job metadata and reproducibility)

module load tensorflow-conda
module list  # job documentation and metadata

echo "job is starting on `hostname`"

which python3
conda list tensorflow
srun python3 \
  tf_gpu.py
exit
Python Environments with conda
Recent Changes
Note
When using your own custom conda environment with a batch job, submit the batch job from within the environment and do not add conda activate commands to the job script; the job inherits your environment.
Batch Jobs
Batch jobs will honor the commands you execute within them. Purge/unload/load modules as needed for that job.
A clean slate might resemble (user has a conda init clause in bashrc for a custom environment):
conda deactivate
conda deactivate  # just making sure
module purge
module reset  # load the default Delta modules

conda activate base
# commands to load modules and activate environs such that your environment is active before
# you use slurm ( no conda activate commands in the slurm script )
sbatch myjob.slurm  # or srun or salloc
Non-python/conda HPC users would see per-job stderr from the conda deactivate above (user has never run conda init bash):
[arnoldg@dt-login03 ~]$ conda deactivate
bash: conda: command not found
[arnoldg@dt-login03 ~]$

# or

[arnoldg@dt-login03 ~]$ conda deactivate

CommandNotFoundError: Your shell has not been properly configured to use 'conda deactivate'.
To initialize your shell, run

    $ conda init <SHELL_NAME>

Currently supported shells are:
  - bash
  - fish
  - tcsh
  - xonsh
  - zsh
  - powershell

See 'conda init --help' for more information and options.

IMPORTANT: You may need to close and restart your shell after running 'conda init'.
Intel AI Analytics Toolkit
The Intel AI Analytics Toolkit (AI Kit) module contains a subset of what you will find in anaconda_cpu.
It contains conda environments optimized for CPU execution: PyTorch & TensorFlow.
We have seen up to 2x speedup when using the AI Kit compared to the stock anaconda_cpu.
For best results, set OMP_NUM_THREADS to the number of cores you’d like to use (--cpus-per-task in Slurm).
Containers
See Containers.
LLMFlux
LLMFlux is a module that allows users to run a Large Language Model (LLM) as a batch processing job with SLURM, using JSONL formatted files as input and allowing for customized model selection using either OLLAMA or vLLM as backend servers. LLMFlux uses an OpenAI-compatible API format to maximize it’s utility.
LLMFlux is launched from the head node and handles all batch submission internally. It uses minimal head node resources to launch job. Once the job is submitted and the job is complete, LLMFlux writes the output to JSON for machine or human parsing.
How to set up LLMFlux
To set up LLMFlux, you will need to load the module.
module load llmflux
The module load will provide a conda environment you can activate that contains LLMFlux. To activate the environment:
conda activate base
With the environment active, you can run the following command to test that LLMFlux is active:
llmflux -h
A usage message should appear, indicating that LLMFlux is now ready to use.
How to run LLMFlux
LLMFlux includes a command-line interface for submitting batch processing jobs. To process a JSONL directly using the llama3.2 model with 3 billion parameters, you would find the corresponding name in src/llmflux/templates under the folder llama3.2 in the 3b.yaml file:
# Llama 3.2 3B Configuration
name: "llama3.2:3b"
hf_name: "meta-llama/Llama-3.2-3B-Instruct"

resources:
  gpu_layers: 32
  gpu_memory: "16GB"
  batch_size: 8
  max_concurrent: 2

parameters:
  temperature: 0.7
  top_p: 0.9
  max_tokens: 2048
  stop_sequences: ["###"]  # Default stop sequence from test_prompts.json

system:
  prompt: "You are a helpful AI assistant. You are direct, accurate, and helpful in your responses."

validation:
  temperature_range: [0.0, 1.0]
  max_tokens_limit: 4096
  batch_size_range: [1, 16]
  concurrent_range: [1, 4]

# Resource Requirements
requirements:
  min_gpu_memory: "16GB"  # Minimum required for safe operation
  recommended_gpu: "A100"
  cuda_version: ">=12.0"
  cpu_threads: 4
  gpu_memory_utilization: 0.9
Every model has a name parameter at the top. This name will work for both ollama and vllm, within LLMFlux. If you are using vLLM as your engine, the model it will pull is listed as hf_name. If you are using Ollama, the name parameter gives the Ollama version of the name. If you have a custom model, you will need to create a yaml file based on an existing example.
To test your model, you can run a benchmark command.
Once you have selected which model, you will need to prepare the inputs JSONL file.
{"custom_id":"request1","method":"POST","url":"/v1/chat/completions","body":{"messages":[{"role":"system","content":"You are a helpful assistant"},{"role":"user","content":"Explain quantum computing"}],"temperature":0.7,"max_tokens":500}}
{"custom_id":"request2","method":"POST","url":"/v1/chat/completions","body":{"messages":[{"role":"system","content":"You are a helpful assistant"},{"role":"user","content":"What is machine learning?"}],"temperature":0.7,"max_tokens":500}}
Ensure that the JSONL has a model parameter under body that matches the name in the configuration yaml file.
With the inputs prepared, you are ready to run LLMFlux. The command to run the basic JSONL above looks something like:
llmflux run --model Llama-3.2-3B-Instruct --input data/prompts.jsonl --output results/output.json
To run this same command, but using the vLLM backend:
llmflux run --model Llama-3.2-3B-Instruct --input data/prompts.jsonl --output results/output.json --engine=vllm
Note that at the moment the only two valid choices for engine are “vllm” or “ollama.” In the future, we may add support for different engines.
Jupyter Notebooks
Note
The Delta Open OnDemand (OOD) portal provides an easy method to start a Jupyter notebook; this is the recommended method.
Go to OOD Jupyter interactive app for instructions on how to start an OOD JupyterLab session.
You can also customize your OOD JupyterLab environment:
Do not run Jupyter on the shared login nodes. Instead, follow these steps to attach a Jupyter notebook running on a compute node to your local web browser:
How to Run Jupyter on a Compute Node
The Jupyter notebook executables are in your $PATH after loading a *conda module. If you run into problems from a previously saved Jupyter session (for example, you see paths where you do not have write permission), you may remove this file to get a fresh start: $HOME/.jupyter/lab/workspaces/default-*.
Follow these steps to run Jupyter on a compute node (CPU or GPU):
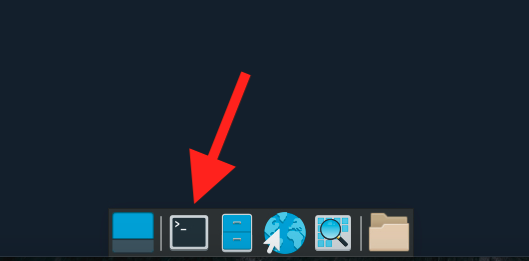
On your local machine/laptop, open a terminal.
SSH into Delta. (Replace
<my_delta_username>with your Delta login username).ssh <my_delta_username>@login.delta.ncsa.illinois.edu
Enter your NCSA password and complete the Duo MFA. Note, the terminal will not show your password (or placeholder symbols such as asterisks [*]) as you type.
Warning
If there is a conda environment active when you log into Delta, deactivate it before you continue. You will know you have an active conda environment if your terminal prompt has an environment name in parentheses prepended to it, like these examples:
(base) [<delta_username>@dt-login01 ~]$

(mynewenv) [<delta_username>@dt-login01 ~]$
Run
conda deactivateuntil there is no longer a name in parentheses prepended to your terminal prompt. When you don’t have any conda environment active, your prompt will look like this:[<delta_username>@dt-login01 ~]$
Load the appropriate conda module. To see all of the available anaconda modules, run
module avail conda. This example usespytorch-conda.module load pytorch-conda
Verify the module is loaded.
module list
Verify a jupyter-notebook is in your
$PATH.which jupyter-notebook
Generate a
MYPORTnumber and copy it to a notepad (you will use it in steps 9 and 12).MYPORT=$(($(($RANDOM % 10000))+49152)); echo $MYPORT
Find the the
account_namethat you are going to use and copy it to a notepad (you will use it in step 9); your accounts are listed underProjectwhen you run theaccountscommand.Note
To use a GPU node, you must pick a GPU account (the account name will end in “…-gpu”).
accountsRun the following
sruncommand, with these replacements:Replace
<account_name>with the account you are going to use, which you found and copied in step 8.Replace
<$MYPORT>with the$MYPORTnumber you generated in step 7.Modify the
--partition,--time, and--memoptions and/or add other options to meet your needs.
srun --account=<account_name> --partition=cpu-interactive --time=00:30:00 --mem=32g jupyter-notebook --no-browser --port=<$MYPORT> --ip=0.0.0.0
Copy the last 5 lines returned beginning with: “To access the notebook, open this file in a browser…” to a notepad (you will use this information steps 12 and 14). (It may take a few minutes for these lines to be returned.)
Note these two things about the URLs you copied:
The first URL begins with
http://<cnXXX>.delta...,<cnXXX>is the internal hostname and will be used in step 12.The second URL begins with
http://127.0..., you will use this entire URL in step 14.
Open a second terminal on your local machine/laptop.
Run the following
sshcommand, with these replacements:Replace
<my_delta_username>with your Delta login username.Replace
<$MYPORT>with the$MYPORTnumber you generated in step 7.Replace
<cn0XX>with internal hostname you copied in step 10.
ssh -l <my_delta_username> -L 127.0.0.1:<$MYPORT>:<cn0XX>.delta.ncsa.illinois.edu:<$MYPORT> dt-login.delta.ncsa.illinois.edu
Enter your NCSA password and complete the Duo MFA. Note, the terminal will not show your password (or placeholder symbols such as asterisks [*]) as you type.
Copy and paste the entire second URL from step 10 (begins with
https://127.0...) into your browser. You will be connected to the Jupyter instance running on your compute node of Delta.
How to Run Jupyter on a Compute Node, in an NGC Container
Follow these steps to run Jupyter on a compute node, in an NGC container:
On your local machine/laptop, open a terminal.
SSH into Delta. (Replace
<my_delta_username>with your Delta login username.)ssh <my_delta_username>@login.delta.ncsa.illinois.edu
Enter your NCSA password and complete the Duo MFA. Note, the terminal will not show your password (or placeholder symbols such as asterisks [*]) as you type.
Generate a
$MYPORTnumber and copy it to a notepad (you will use it in steps 6, 8, and 14).MYPORT=$(($(($RANDOM % 10000))+49152)); echo $MYPORT
Find the the
account_namethat you are going to use and copy it to a notepad (you will use it in step 6); your accounts are listed underProjectwhen you run theaccountscommand.Note
To use a GPU node, you must pick a GPU account (the account name will end in “…-gpu”).
accountsRun the following
sruncommand, with these replacements:Replace
<account_name>with the account you are going to use, which you found and copied in step #5.Replace
<project_path>with the name of your projects folder (in two places).Replace
<$MYPORT>with theMYPORTnumber you generated in step 4.Modify the
--partition,--time,--mem, and--gpus-per-nodeoptions and/or add other options to meet your needs.
srun --account=<account_name> --partition=gpuA100x4-interactive --time=00:30:00 --mem=64g --gpus-per-node=1 apptainer run --nv --bind /projects/<project_path> /sw/external/NGC/pytorch:22.02-py3 jupyter-notebook --notebook-dir /projects/<project_path> --no-browser --port=<$MYPORT> --ip=0.0.0.0
Copy the last 2 lines returned (beginning with “Or copy and paste this URL…”) to a notepad. (It may take a few minutes for these lines to be returned.)
Modify the URL you copied in step 7 by changing
hostname:8888to127.0.0.1:<$MYPORT>. You will use the modified URL in step 16. (Replace<$MYPORT>with the$MYPORTnumber you generated in step 4.)Open a second terminal.
SSH into Delta. (Replace
<my_delta_username>with your Delta login username.)ssh <my_delta_username>@login.delta.ncsa.illinois.edu
Enter your NCSA password and complete the Duo MFA. Note, the terminal will not show your password (or placeholder symbols such as asterisks [*]) as you type.
Find the internal hostname for your job and copy it to a notepad (you will use it in step 14).
squeue -u $USER
The value returned under
NODELISTis the internal hostname for your GPU job (gpuaXXX). You can now close this terminal.Open a third terminal.
Run the following
sshcommand, with these replacements:Replace
<my_delta_username>with your Delta login username.Replace
<$MYPORT>with the$MYPORTnumber you generated in step 4.Replace
<gpuaXXX>with internal hostname you copied in step 12.
ssh -l <my_delta_username> -L 127.0.0.1:<$MYPORT>:<gpuaXXX>.delta.internal.ncsa.edu:<$MYPORT> dt-login.delta.ncsa.illinois.edu
Enter your NCSA password and complete the Duo MFA. Note, the terminal will not show your password (or placeholder symbols such as asterisks [*]) as you type.
Copy and paste the entire modified URL (beginning with
https://127.0...) from step 8 into your browser. You will be connected to the Jupyter instance running on your gpu node of Delta.
MATLAB
There is a University-wide MATLAB license linked on Delta; you no longer need to link your own license to use MATLAB on the system. Use module avail matlab to see the available versions. You can launch MATLAB on a compute node from a terminal on your local machine or in Delta’s Open OnDemand Desktop app.
Launch MATLAB from a Terminal
When you launch MATLAB from a terminal on your local machine, you can launch it with the Graphical User Interface (GUI) or run it directly in the command line (without the GUI).
Graphical User Interface (GUI)
To use the GUI, you need to have X11 forwarding enabled. If you did not enable X11 forwarding when you logged in to the system, re-log in and enable it with the following
sshcommand. Replaceusernamewith your NCSA username.ssh -Y username@login.delta.ncsa.illinois.edu
Load the default version of MATLAB (or specify a version) with the
module loadcommand. You can see which versions are available withmodule avail matlab.module load matlab
After the MATLAB module loads, run the following
sruncommand, with modifications. Replaceaccount_namewith the name of an account you have access to on Delta (you can find these by running theaccountscommand). Modify thetime,nodes,partition, and other variables, as needed.srun --x11 --time=00:15:00 --nodes=1 --ntasks-per-node=4 --account=account_name --partition=cpu-interactive --pty /bin/bash
See Running Jobs - Interactive Jobs for more information about interactive jobs on Delta.
After your job starts, run
matlabto launch the MATLAB GUI.
Command Line Interface (no GUI)
Load the default version of MATLAB (or specify a version) with the
module loadcommand. You can see which versions are available withmodule avail matlab.module load matlab
After the MATLAB module loadss, run the following
sruncommand, with modifications. Replaceaccount_namewith the name of an account you have access to on Delta (you can find these by running theaccountscommand). Modify thetime,nodes,partition, and other variables, as needed.srun --time=00:15:00 --nodes=1 --ntasks-per-node=4 --account=account_name --partition=cpu-interactive --pty /bin/bash
See Running Jobs - Interactive Jobs for more information about interactive jobs on Delta.
After your job starts, run
matlab -nodisplayto launch MATLAB in the command line.
Launch MATLAB from Open OnDemand
You can also use MATLAB on Delta through the Open OnDemand Desktop app.
In the Desktop app, open a terminal.
In the terminal, run the following commands to load and run MATLAB. If you want to load a version other than the default, modify your
module loadcommand to load the specific version. You can see which versions are available withmodule avail matlab.# load the matlab module module load matlab # run matlab matlab