How to Set Up an R Environment in JupyterLab
R is available in JupyterLab by activating the environment via the anaconda_Rcpu module.
R will run on the CPU cores (not GPU enabled).
Start a new Jupyter Lab session in Open OnDemand.
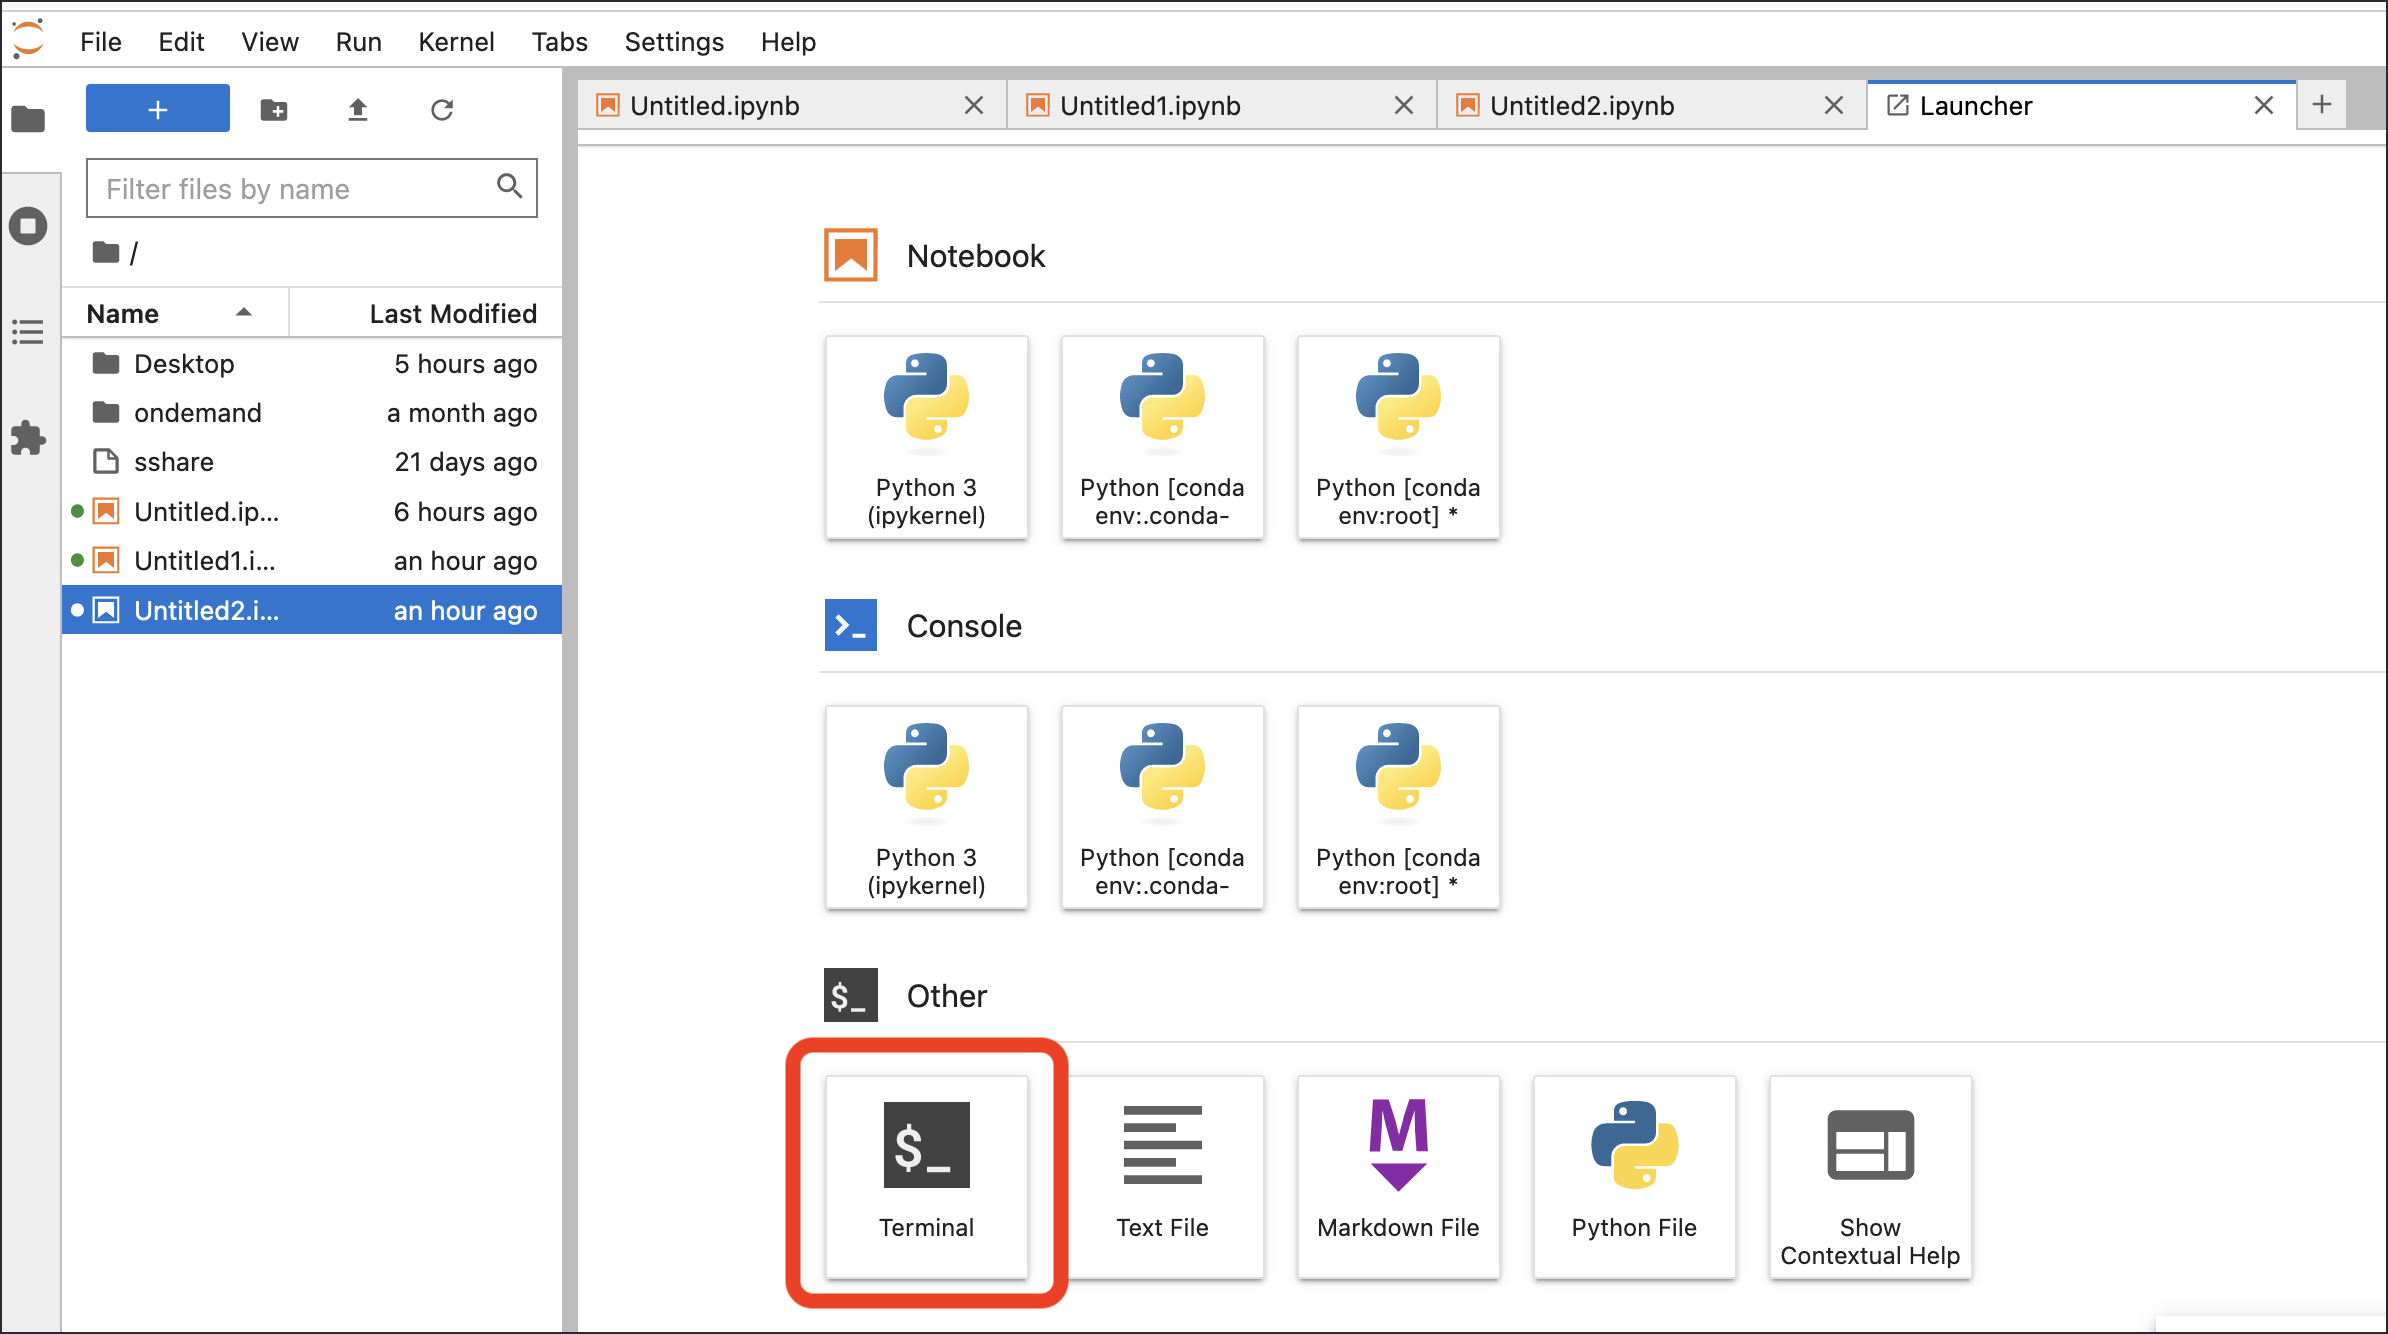
In the JupyterLab Launcher, start a new Terminal session.
If you are automatically launching a Conda environment in your default shell setup, deactivate it.
$ conda deactivate
Load the R environment.
$ module load anaconda3_Rcpu
Launch R.
$ R
You should now be in an R session (your terminal prompt will change from
$to>). Inside the R session, runIRkernel::installspec().> IRkernel::installspec()
Quit R.
> q()
Close the Terminal window in JupyterLab. That should return you to the JupyterLab Launcher (if it doesn’t, open a new Launcher window).
Reload the web page containing the Launcher. Options for an R notebook and console should be available.
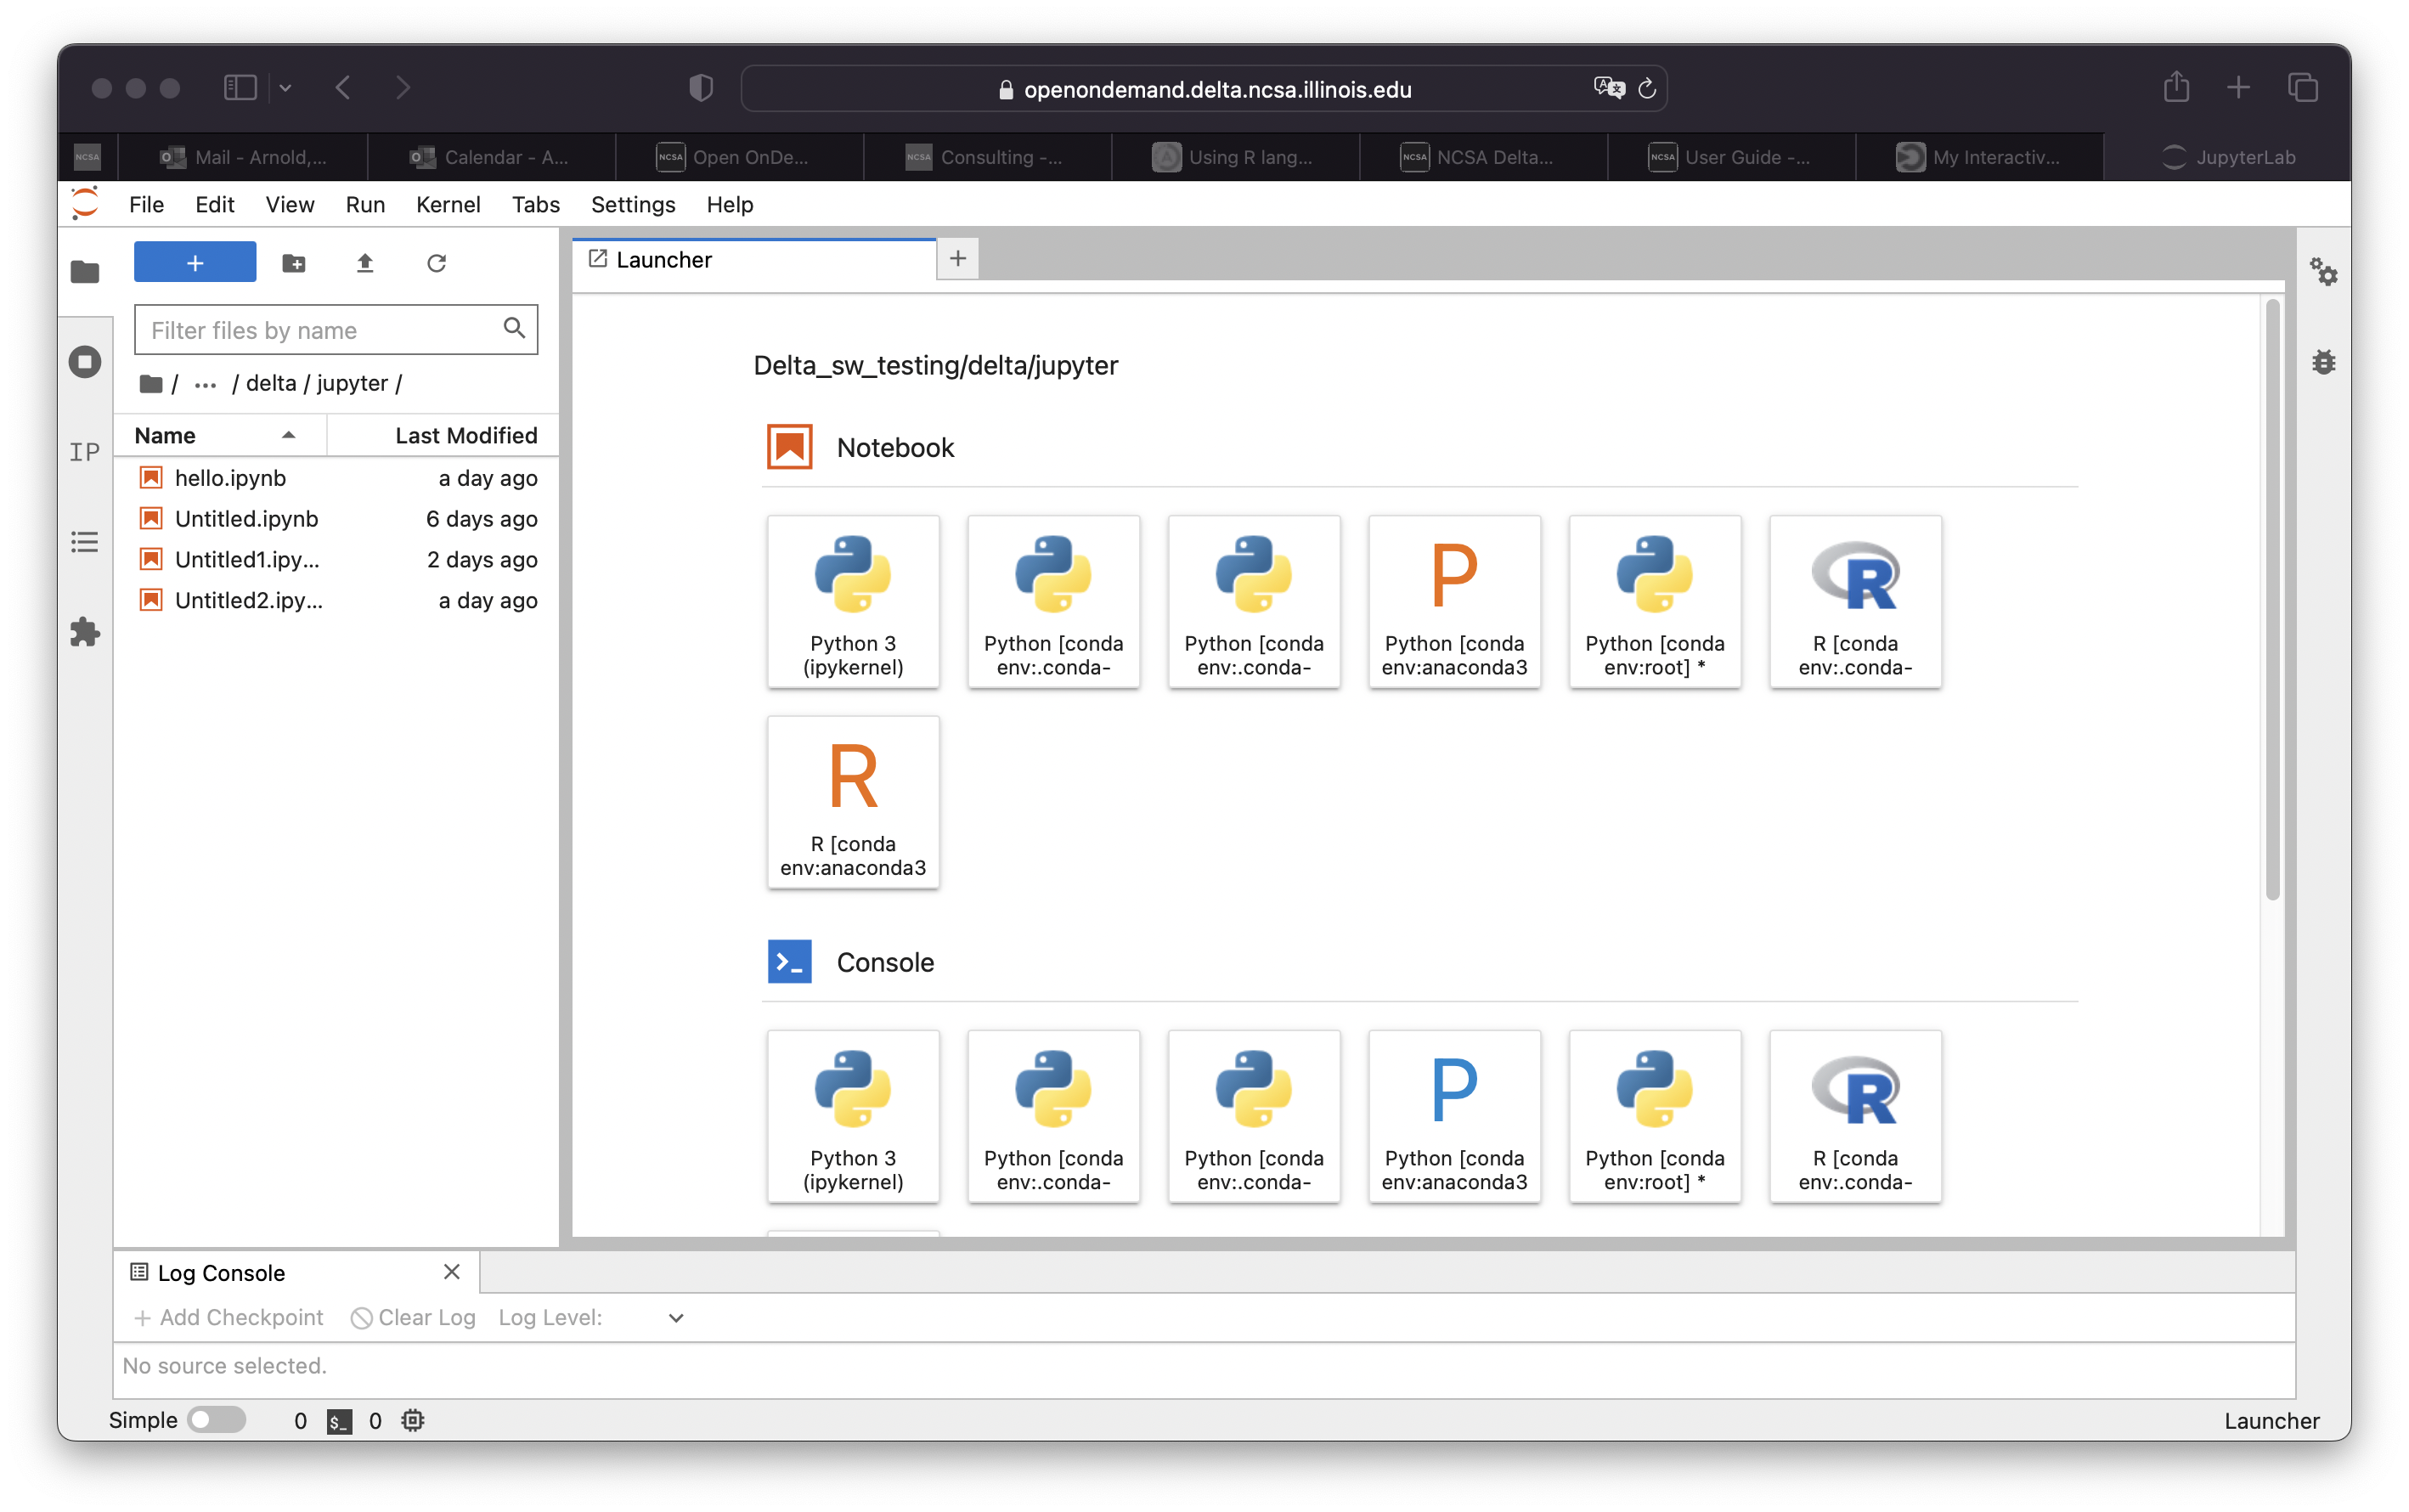
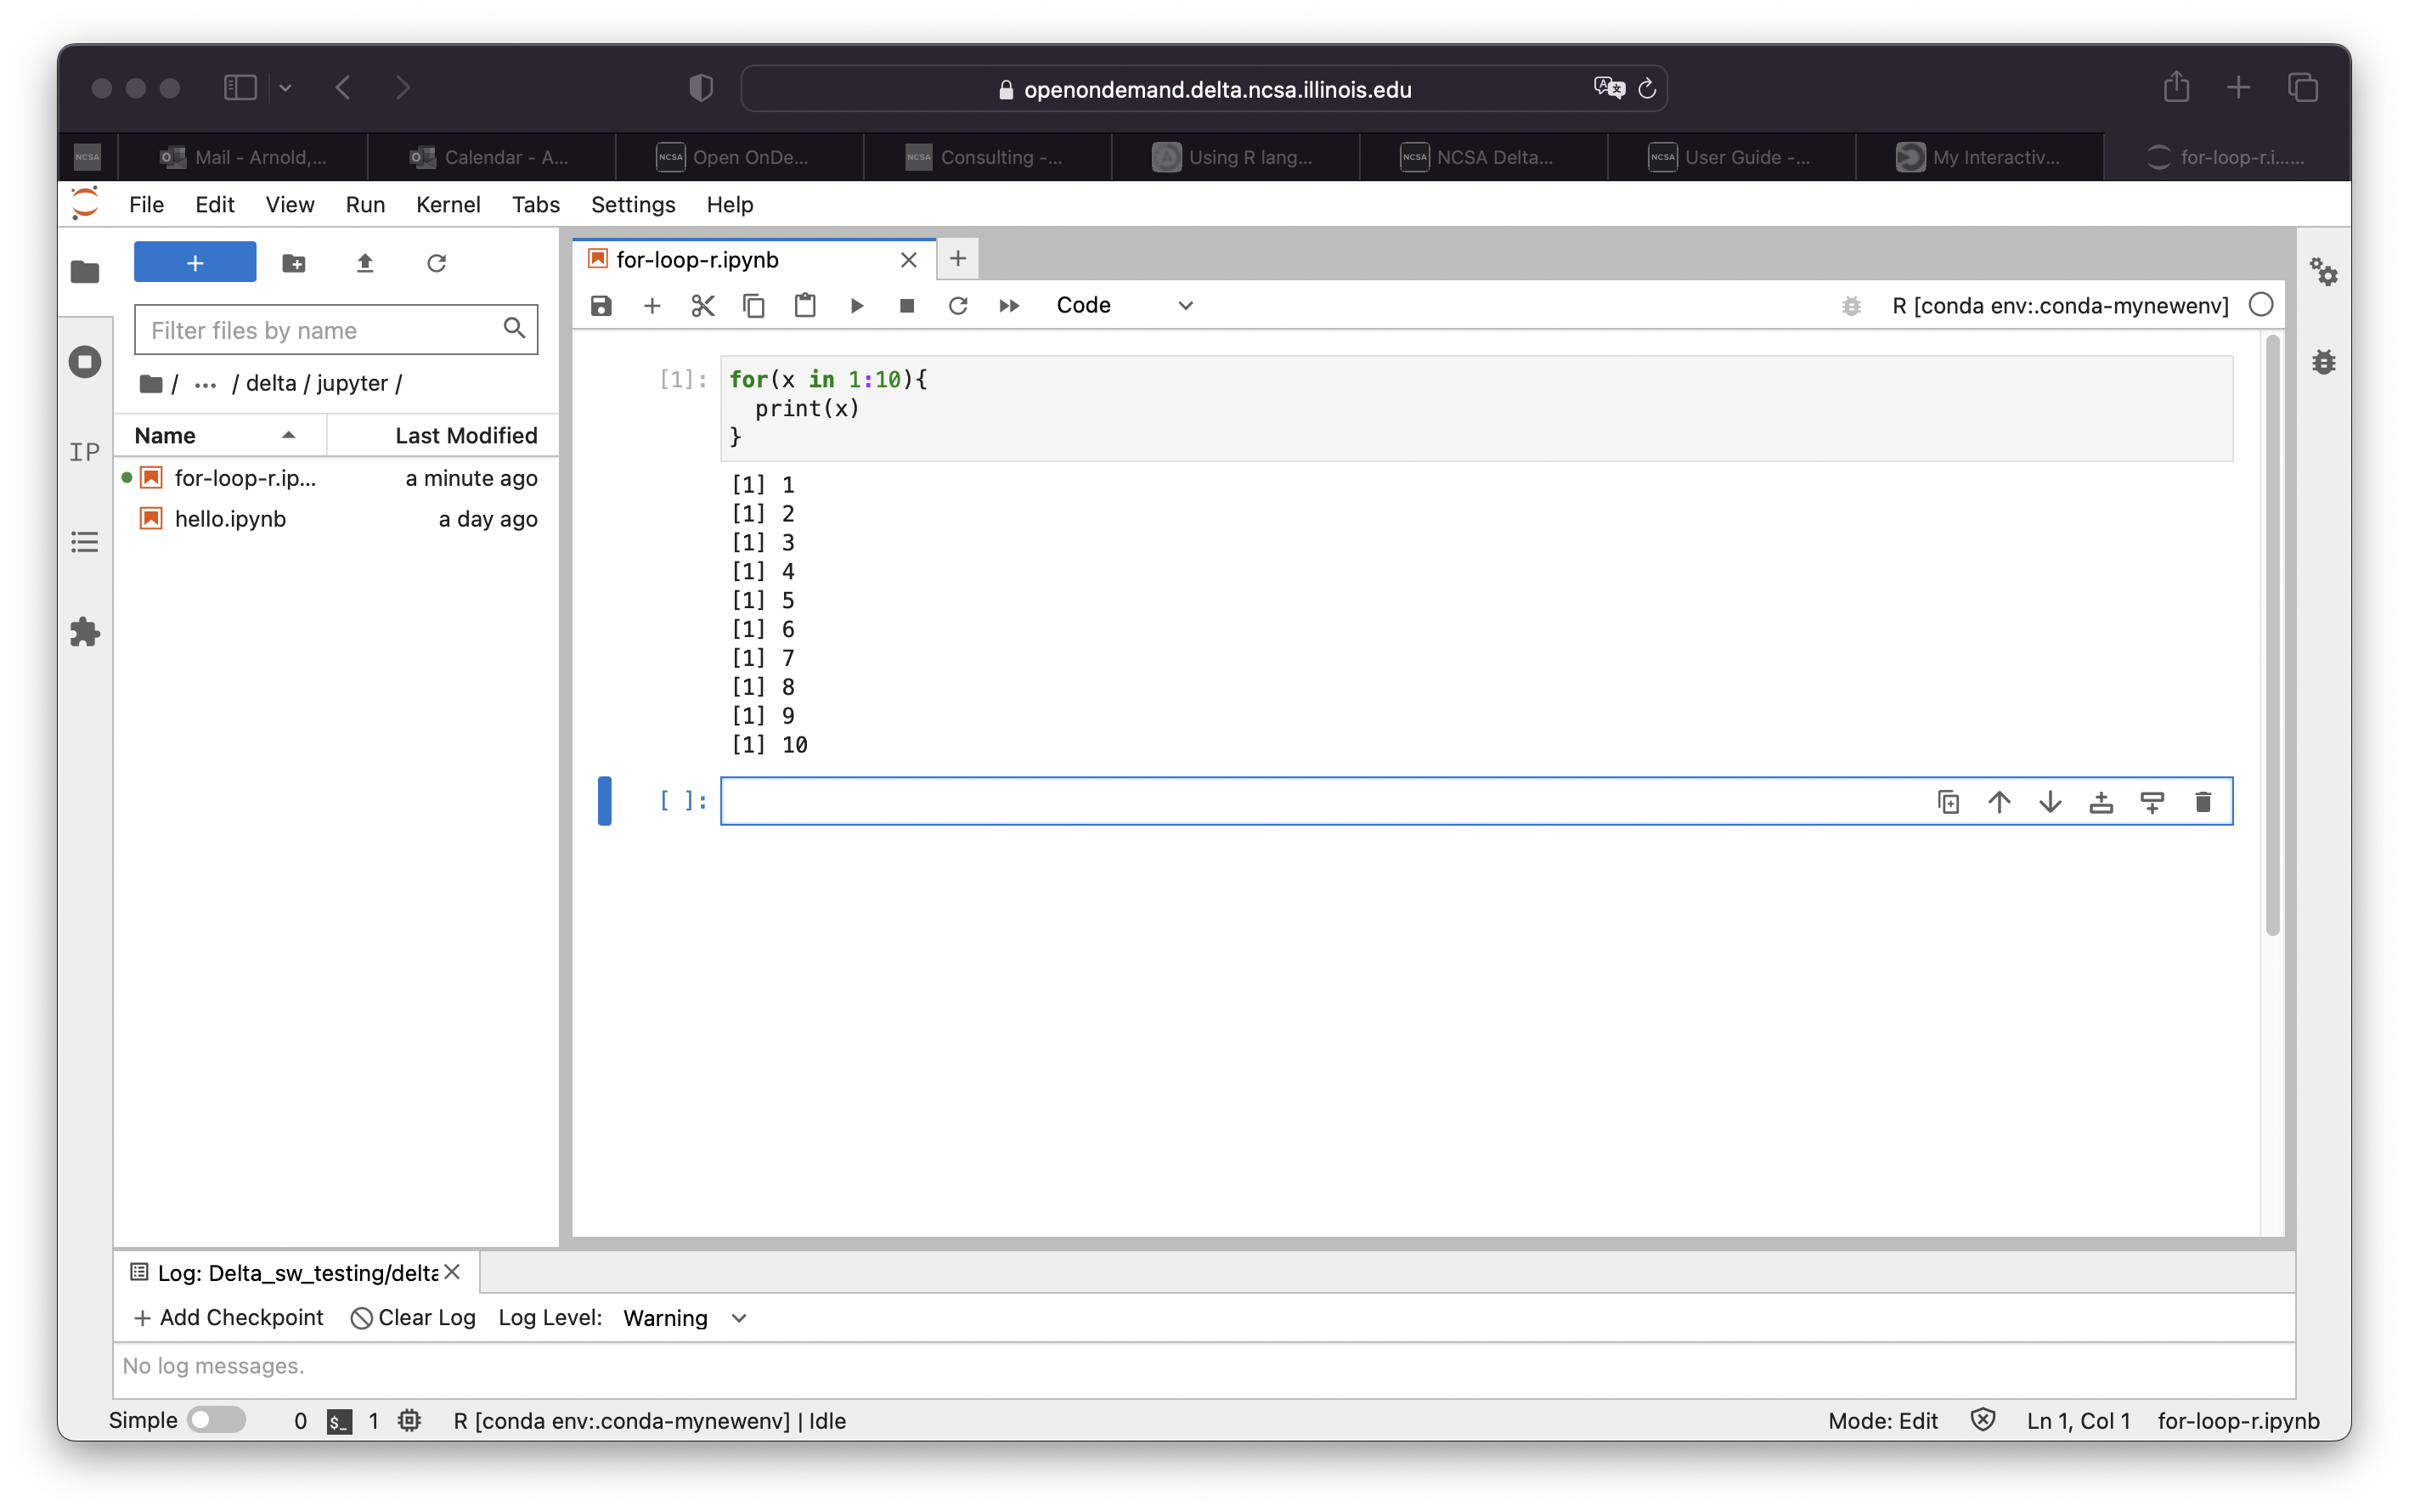
Open an R notebook (or console) and proceed to use R.