Data Transfer
CLI Transfer Method - Secure Copy (scp)
scp is a command line interface (CLI) application that provides a secure way to copy files and directories between machines over an unsecured network. Use scp for small to modest transfers to avoid impacting usability of a system’s login node.
scp requires a source and a destination; these are specified with a file path if it is on your local machine or as <username>@<hostname>:<file_name> if it is on a remote machine.
scp <options> <username>@<source_hostname>:<source_file_path> <username>@<destination_hostname>:<destination_file_path>
Transferring from Local Machine to Remote Machine
scp <options> <source_file_name> <username>@<hostname>:<destination_path>
## ICC example:
## testuser1 transfers a file ("local_file") from their
## local machine to the their home directory on the Campus Cluster

[testuser1_machine] ~ % scp local_file testuser1@cli-dtn.researchdata.illinois.edu:~/
Transferring from Remote Machine to Local Machine
scp <options> <username>@<hostname>:<source_file_path> <destination_path>
## ICC example:
## testuser1 transfers a file ("remote_file") from their
## home directory on the Campus Cluster to their local machine

[testuser1_machine] ~ % scp testuser1@cli-dtn.researchdata.illinois.edu:~/remote_file ./
CLI Transfer Method - rsync
rsync is a CLI utility that syncs files and directories. Use rsync for small to modest transfers to avoid impacting usability of a system’s login node.
rsync requires a source and a destination; these are specified with a file path if it is on your local machine or as <username>@<hostname>:<file_name> if it is on a remote machine.
rsync <options> <username>@<source_hostname>:<source_file_path> <username>@<destination_hostname>:<destination_file_path>
Transferring from Local Machine to Remote Machine
rsync <options> <source_file_name> <username>@<hostname>:<destination_path>
## ICC example:
## testuser 1 transfers the "images" directory from their
## local machine to a projects directory on the Campus Cluster

[testuser1_machine] ~ % ls
images

[testuser1_machine] ~ % rsync -avP images testuser1@cli-dtn.researchdata.illinois.edu:/projects/$teams_directory/
Transferring from Remote Machine to Local Machine
rsync <options> <username>@<hostname>:<source_file_path> <destination_path>
Secure File Transfer Protocol (sftp)
You can transfer data using sftp via the command line or one of many common transfer utilities. Two transfer utility options, WinSCP and Cyberduck, are described below; both are free to download and install.
WinSCP
Download and install WinSCP.
Open WinSCP and log in to the associated NCSA system node.
File protocol: SFTP
Host name:
Port number: 22
User name: The username you use to log in to the system whose hostname you entered.
Password: The password you use to log in to the system whose hostname you entered.
ICC example:

Once you’re logged in, WinSCP works like a drag and drop interface for moving files between your local machine and remote machine connection.
Cyberduck
Download and install Cyberduck.
Open Cyberduck and click Open Connection in the upper left corner.
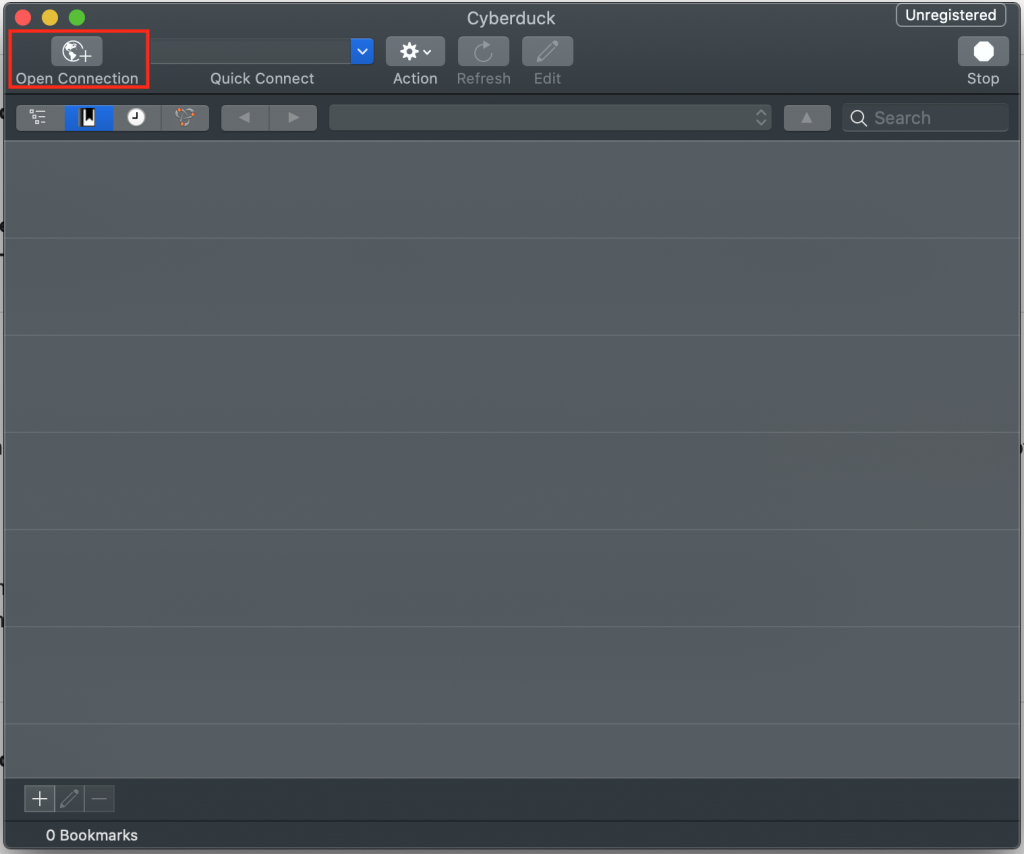
Connect to the associated NCSA system node.
Select SFTP in the drop-down menu.
Server:
Port: 22
Username: The username you use to log in to the system whose hostname you entered.
Password: The password you use to log in to the system whose hostname you entered.
ICC example:

Once connected, you should see a listing of your home directory, and you can navigate the file system via the GUI. Download and upload files, as needed.
Globus
Globus is a web-based file transfer system that works in the background to move files between computer systems with Globus endpoints. Globus is a good tool to use to transfer many files or large files between directories (within the same system or between a systems).
Note
If you are new to Globus, the Globus log in and transfer files tutorial includes step-by-step instructions for transferring files that you can follow along with using their built-in demonstration collections.
The NCSA systems listed have Globus endpoints configured by the system administrators; the collection names for these endpoints are at the links below. To transfer data to/from a system that does not have a Globus endpoint, see Globus Connect Personal.
If you have issues using Globus, review the resources on the Globus Contact Us page.
Note
If you are a member of the University of Illinois, and you are using Globus with an NCSA system, and you have both an NCSA kerberos credentials and a UIUC netID, but they are different, then you should look at this piece of Globus identity documentation. You may need to register two email addresses with globus: ncsakerberoseusername@ncsa.illinois.edu and UIUCnetid@illinois.edu for Globus to pick up your identity properly.
Globus Connect Personal
Install Globus Connect Personal to transfer files between a Globus endpoint and a system that does not have an existing Globus endpoint (a personal laptop, for example). On Nightingale, the protected data requirements still apply.
Tips for setting a personal GCP endpoint (e.g., External Drives)
By default, Globus Connect Personal (GCP) allows access only to a limited set of user directories
(e.g., /home/username on Linux, or /Users/username on macOS, or C:\\Users\\username on Windows).
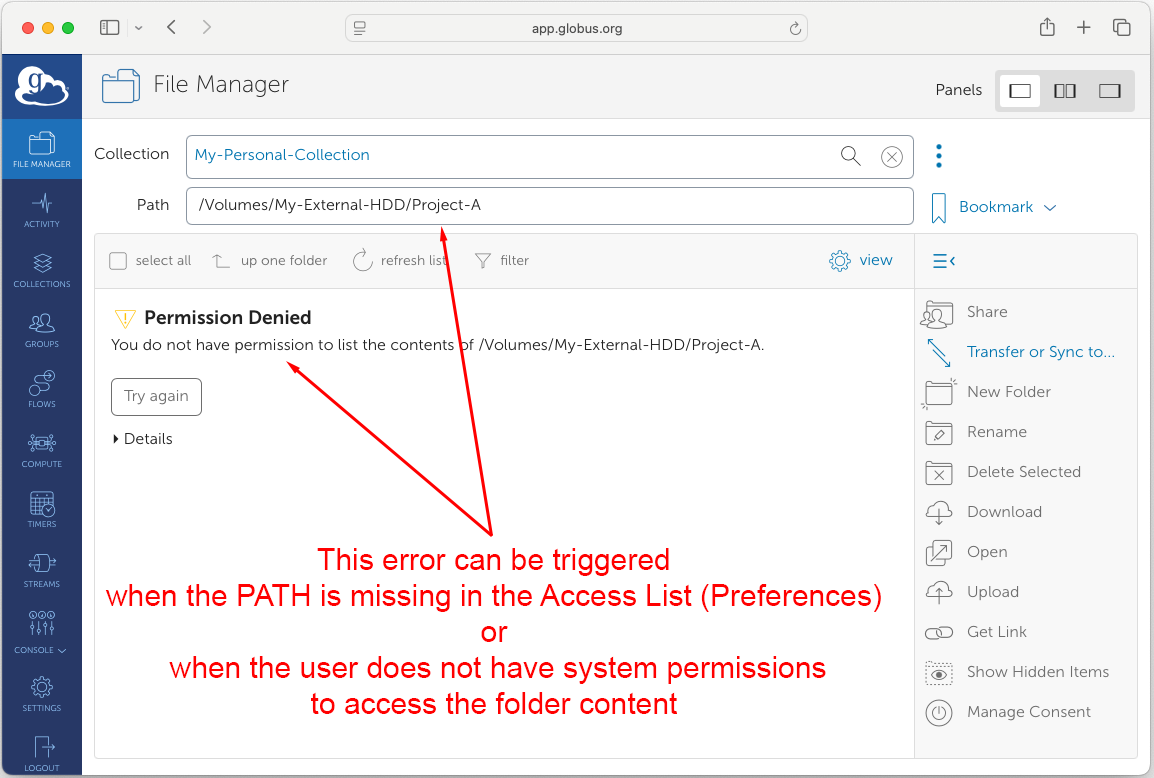
Files stored in other system locations, including external drives, are not accessible unless they are added to the endpoint access list. If a path was not previously added, accessing it through the Globus Web Application might prompt authorization errors.
For more information:
Globus Connect Personal Official Documentation
Steps to add a new path to access list
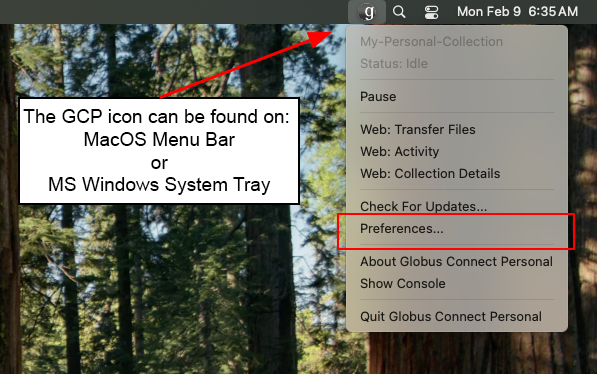
Open Globus Connect Personal Options
Locate the Globus Connect Personal icon on the system. On macOS, this icon appears in the top menu bar (location may vary on different systems).
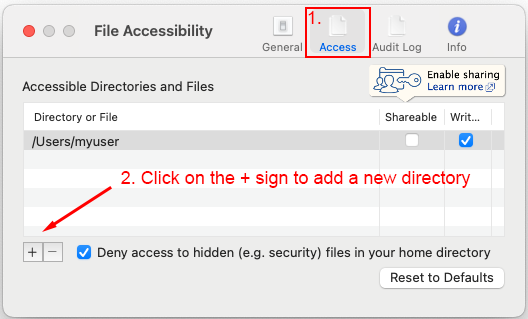
Open the Access Tab and Add a New Path
Click on the Access tab to view the list of folders currently shared by your endpoint. On macOS, the home directory is included by default. In the Access tab, click on the PLUS (+) icon to add a new folder to the list of accessible paths. A file manager window will appear and you will be able to browse your file system.
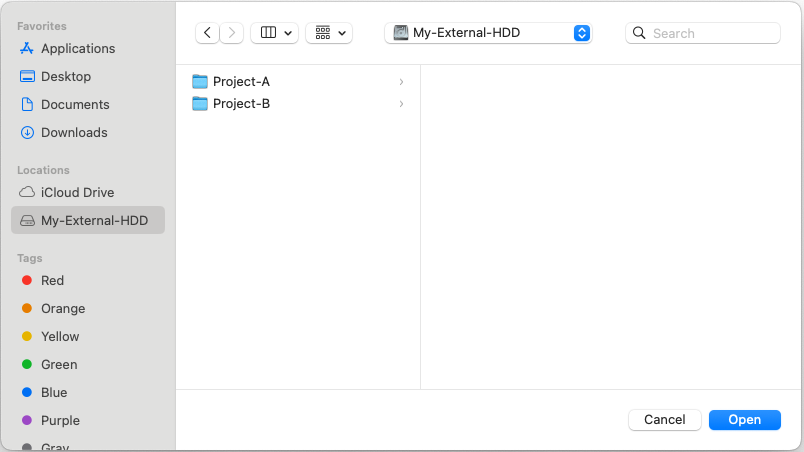
Find the folder to include in the accessible paths (e.g., External Drive)
In the file selection dialog, navigate to the desired location.
Note
On macOS, external drives typically appear in the sidebar.
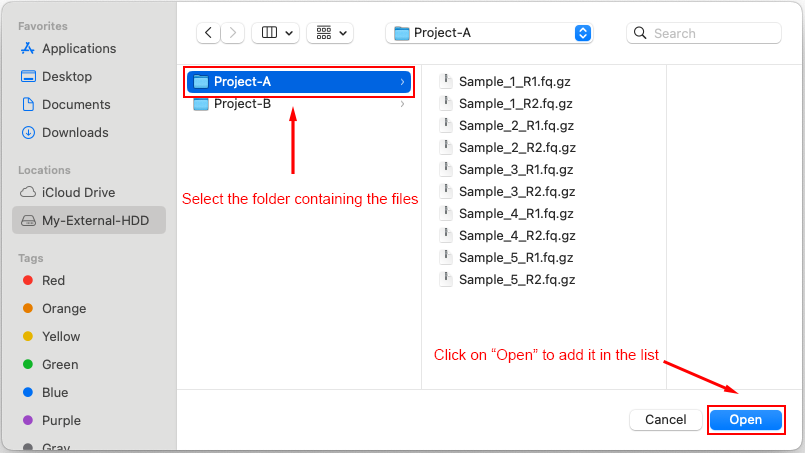
Select the Folder to Share
Browse to the folder you want to share through Globus Endpoint, select it, and confirm your choice by clicking in Open.
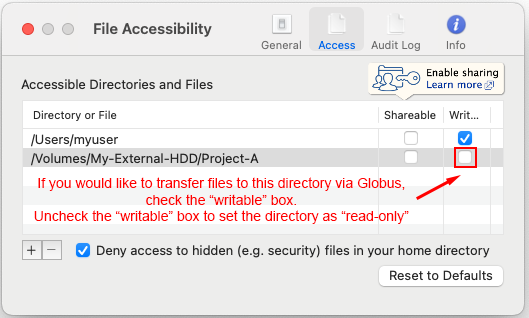
Confirm that the newly added folder now appears in the Access tab list of accessible paths.
This indicates that the endpoint configuration has been updated successfully.
Confirm Access on Globus Web App
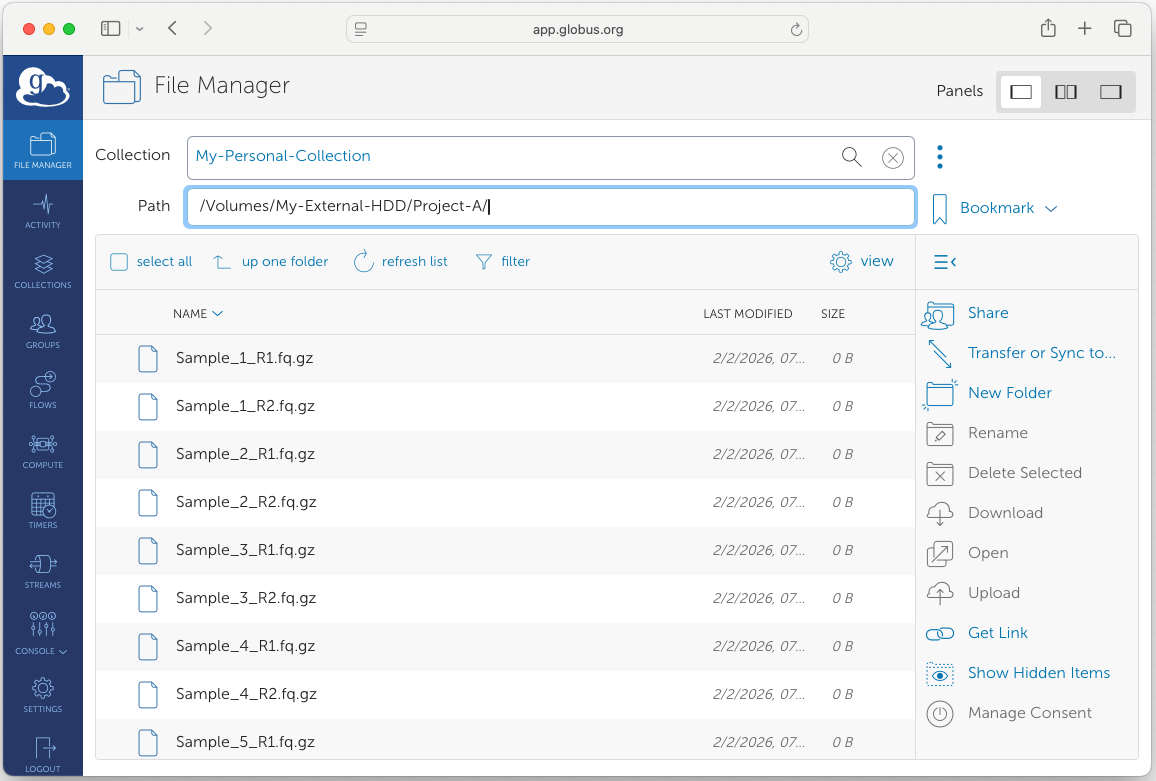
Open the Globus Web App, navigate to your endpoint, and verify that the newly added folder is visible and accessible.
Note
On MacOS, external drives are usually located in /Volumes/{My_External_Drive_Label}/.
Note
On Windows, external drives are usually assiged to a different letter (e.g., D:/, E:/, etc)
Note
On Linux, the location of external drives depends on the distribution. Consult your system administrator for more information.
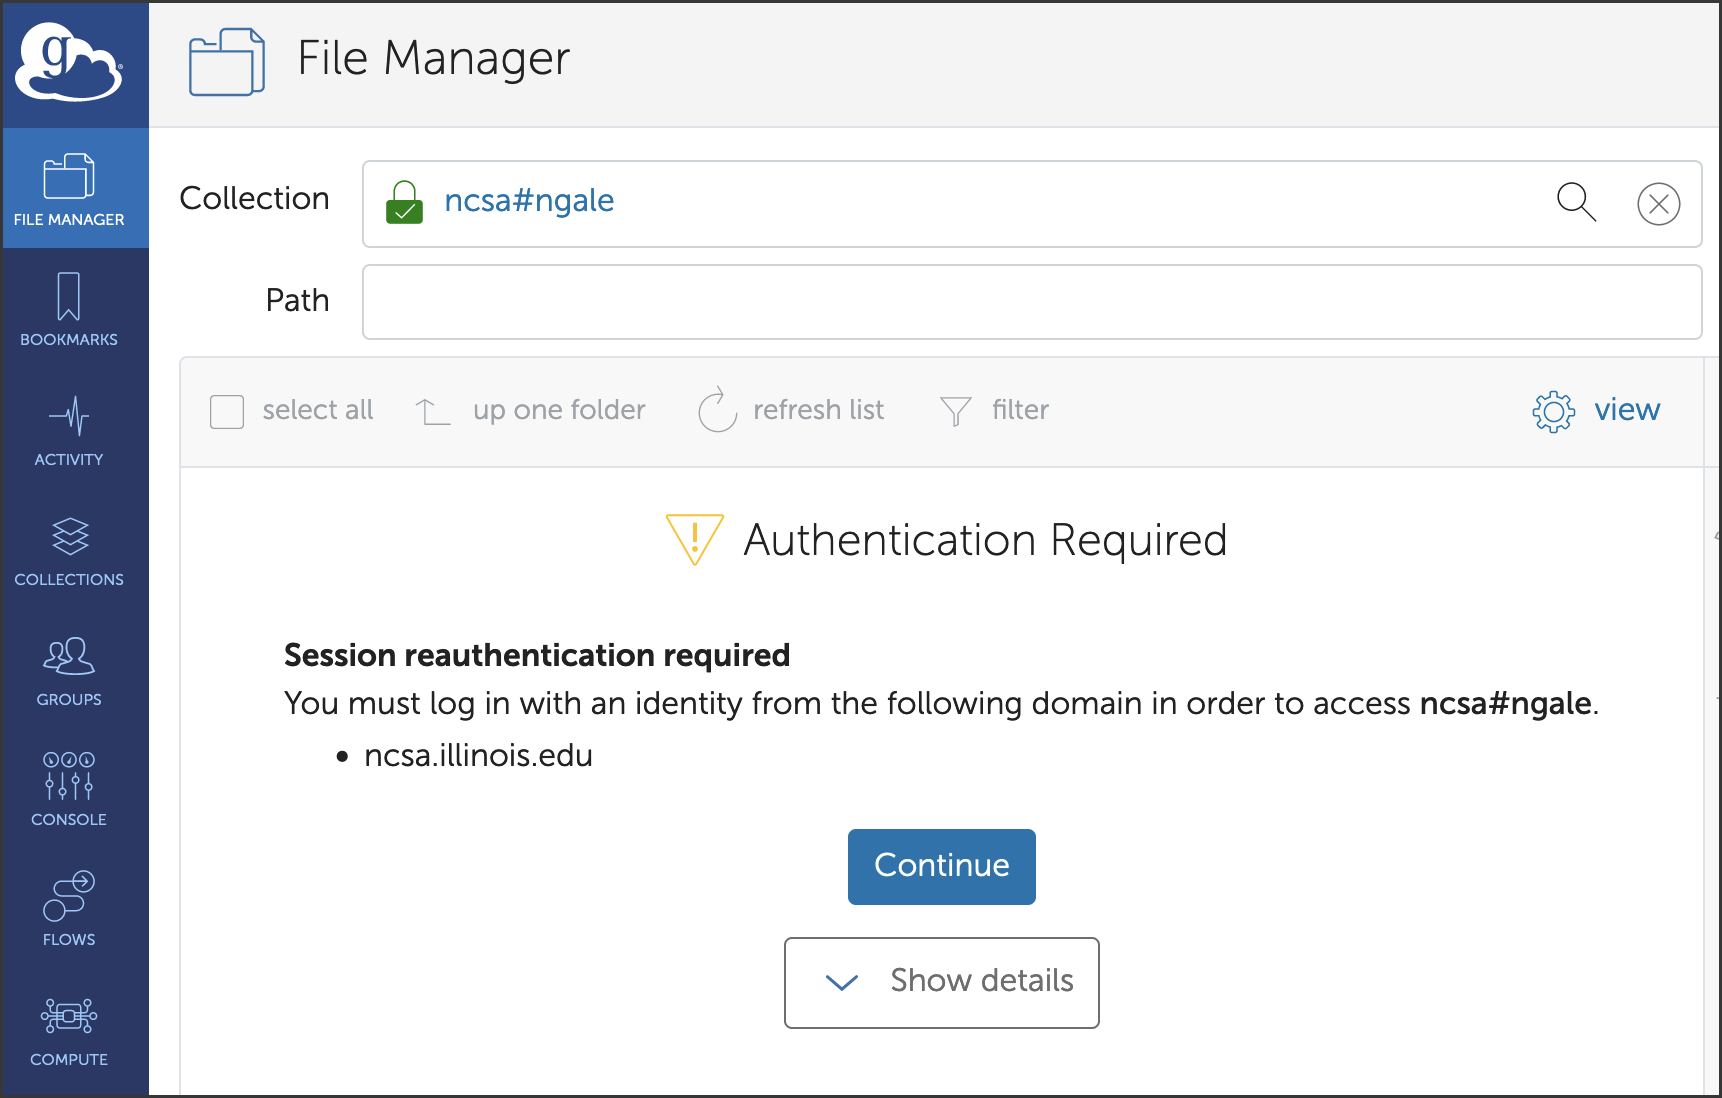
Tips for Using Globus with NCSA Compute Resources
When you select a Globus endpoint for the first time, you may see an Authentication/Consent Required prompt (Nightingale example shown below).
Click Continue.
Click the identity you want to link (there may only be one option).
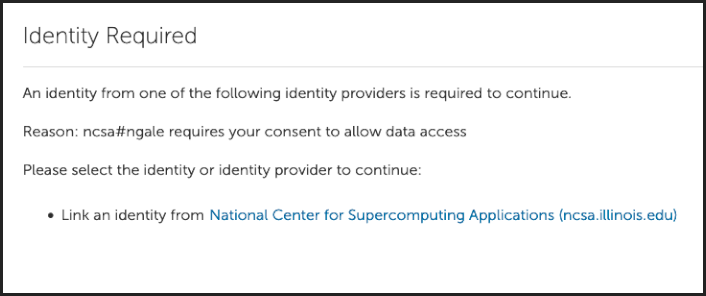
Follow the prompts to log in to and link your required identity.
Reference the Globus link an identity tutorial for instructions on how to proactively link an identity to your Globus account. Consider linking your UIUC, NCSA, and/or ACCESS identity, as applicable, depending on the compute resource(s) you’re using and how you created your Globus account.
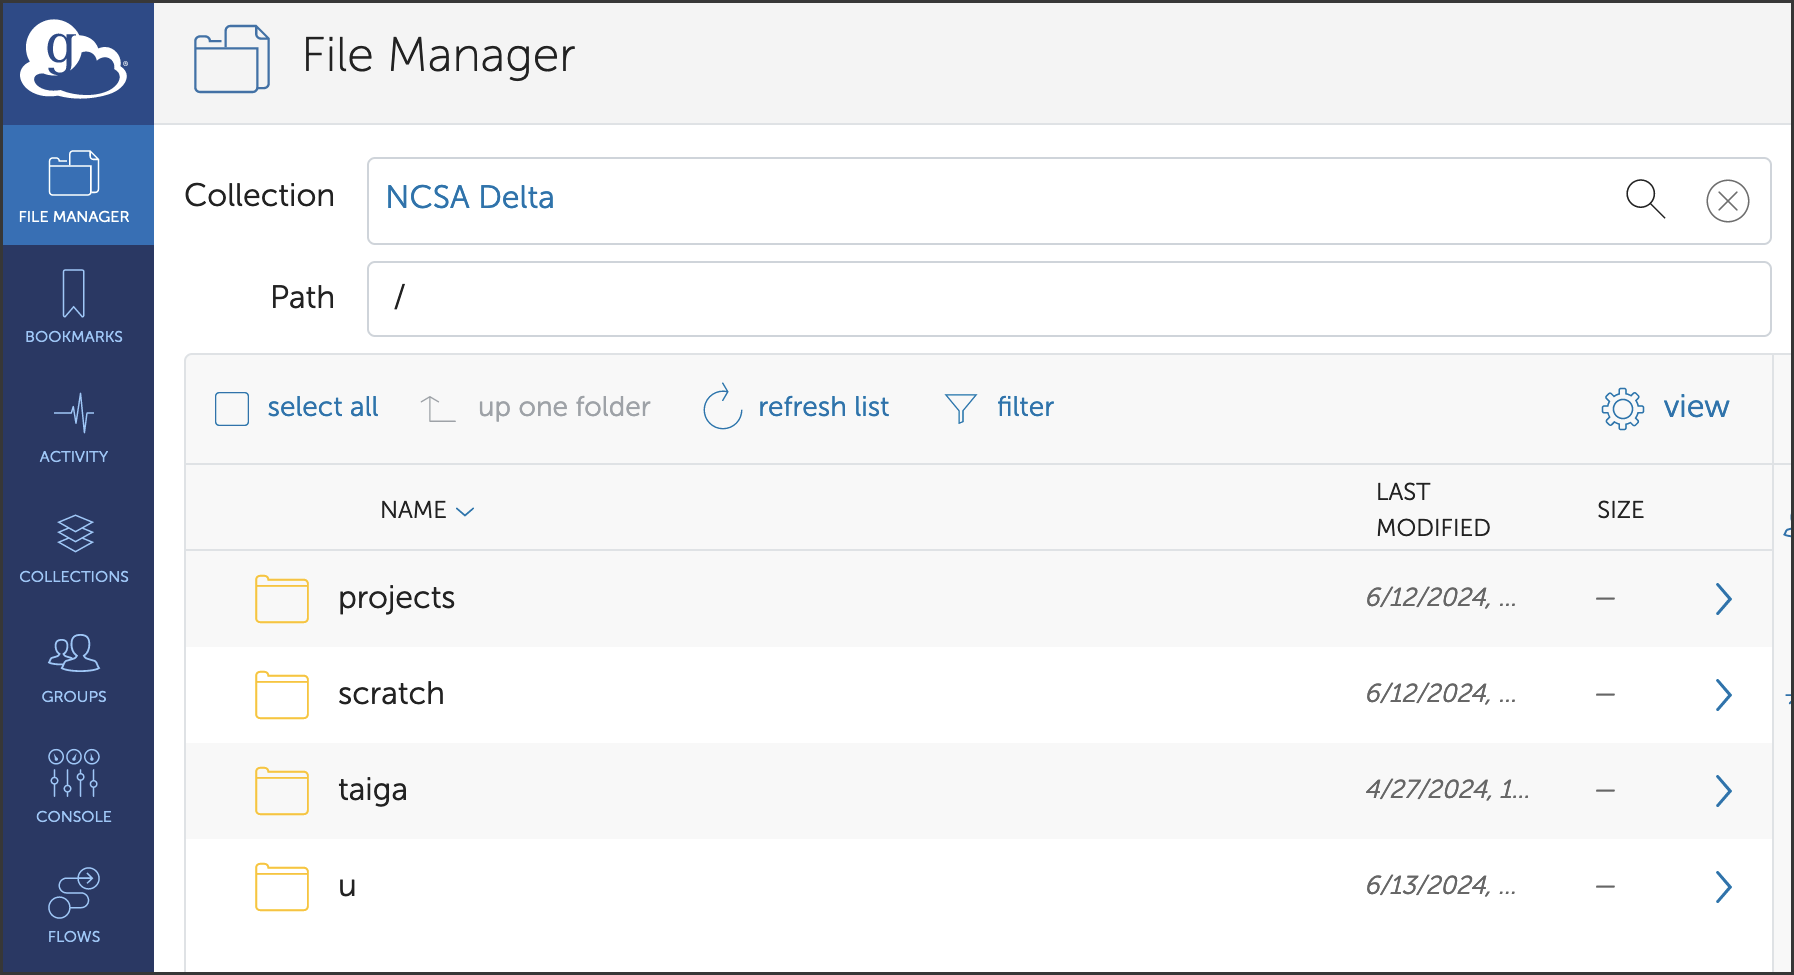
After you have navigated to an endpoint using the Collection search, entering a forward slash ( / ) into the Path field displays the top-level directories you have access to at that endpoint. From there you can navigate to the location you want to transfer to/from. (You can also enter the direct file path into the Path field.)
How to Create a Shared Globus Endpoint
Globus Shared Endpoint functionality is a great way to share data with people that are not affiliated with the University of Illinois system. To grant a person at an external organization access to data you manage, all the other person needs is a free Globus account and an endpoint on their side to transfer the data to.
To set up a shared endpoint:
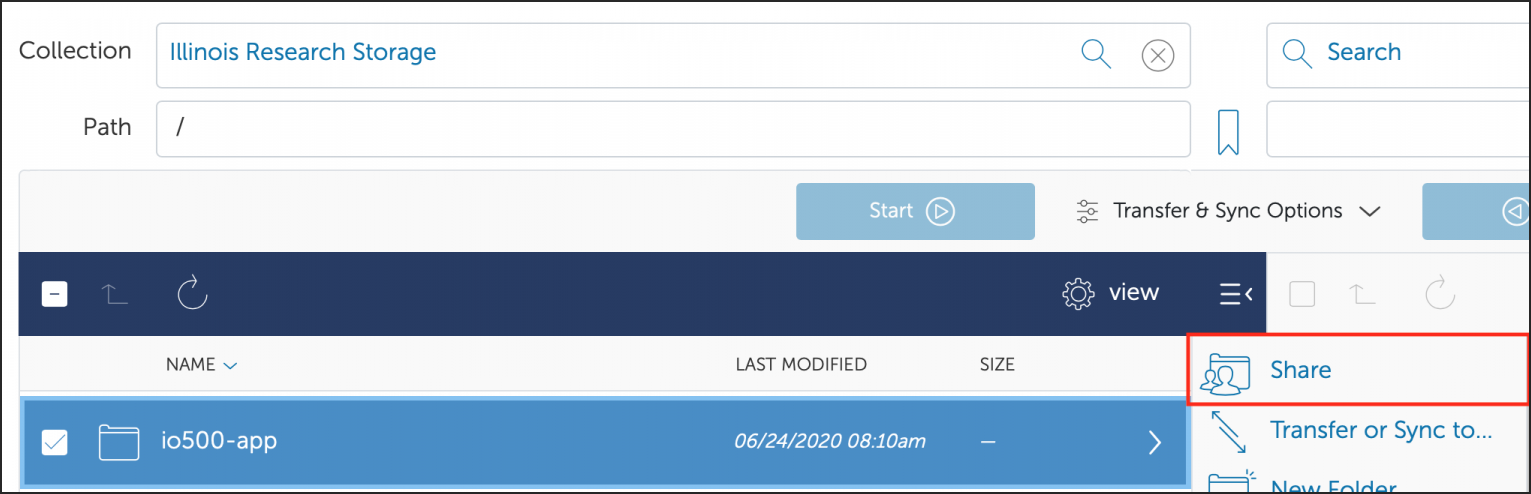
Log into Globus and connect to the “Illinois Research Storage” collection.
Navigate to, and select, the directory you want to share with external users; currently only data in
/projectsis allowed to be shared externally.Click the “Share” button to the right of the directory.
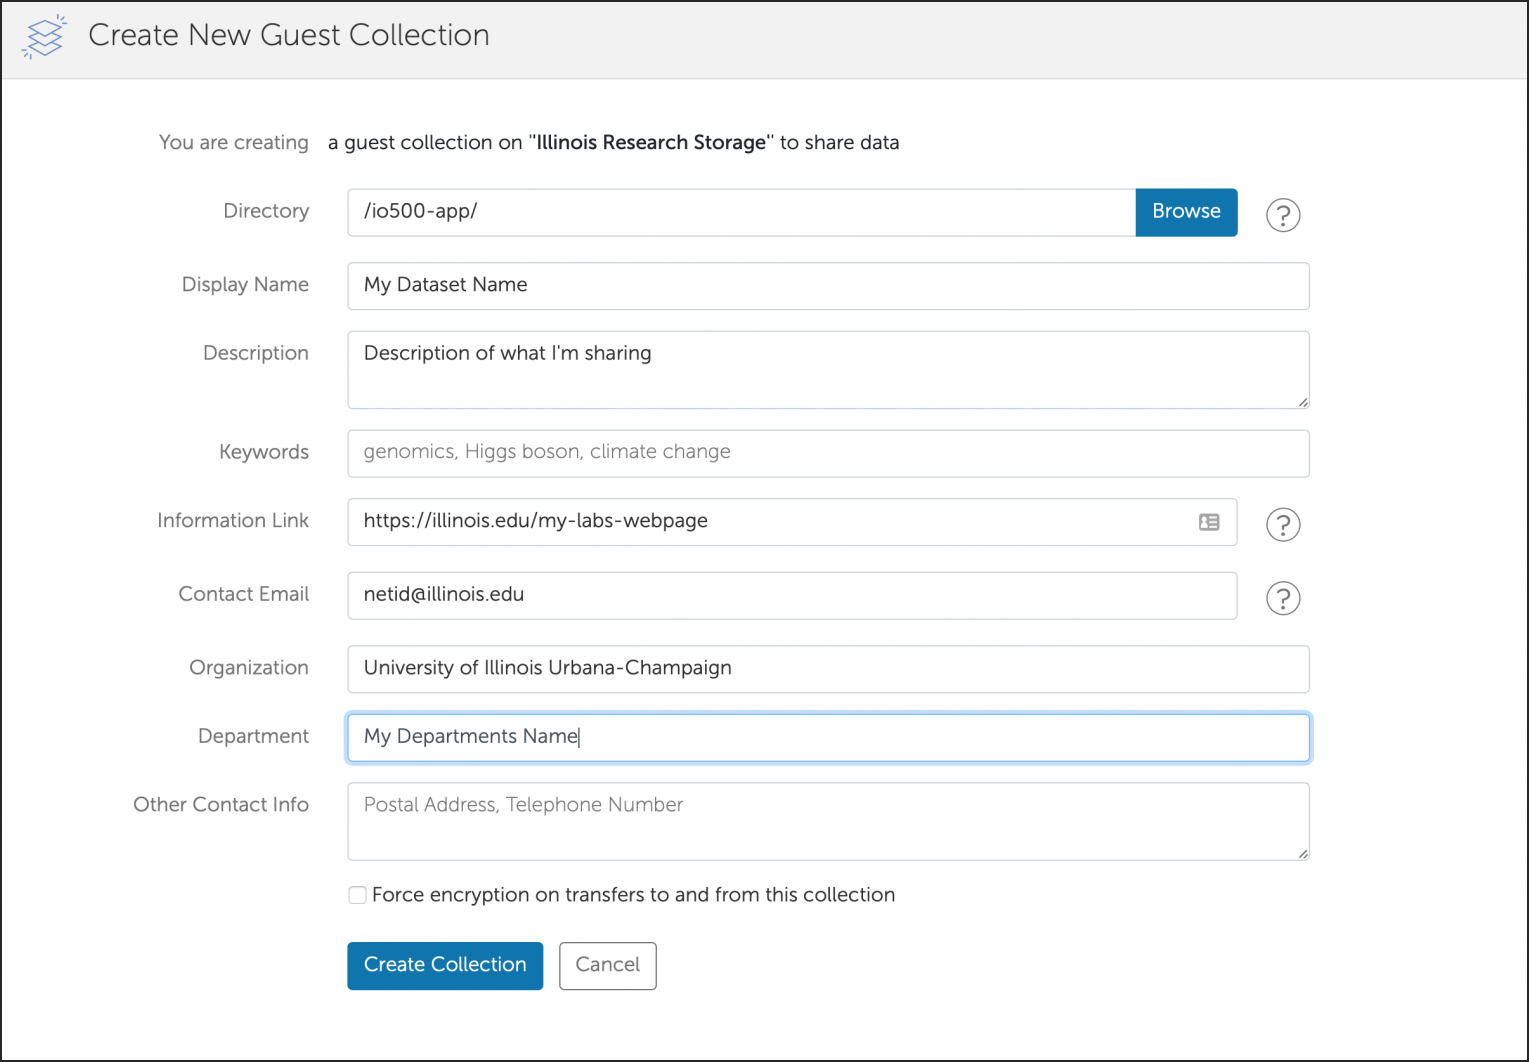
Click the “Add Guest Collection” button.

Fill in all the information about the share and click the “Create Collection” button. The more information you fill in the better, and the easier for others to find.
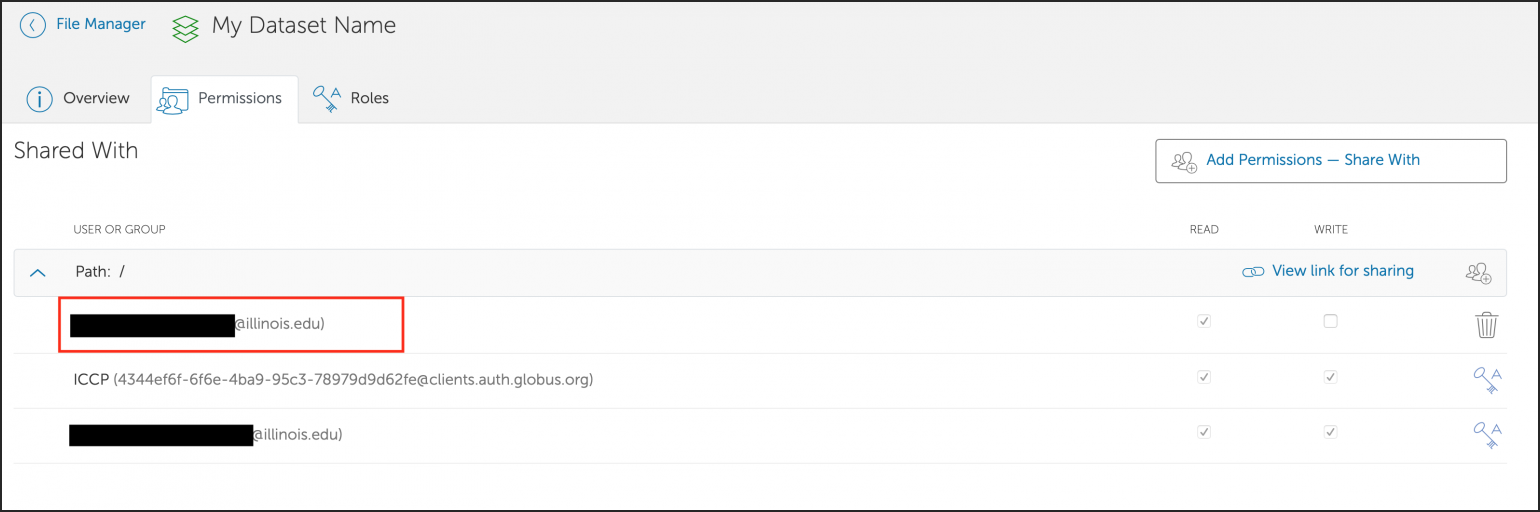
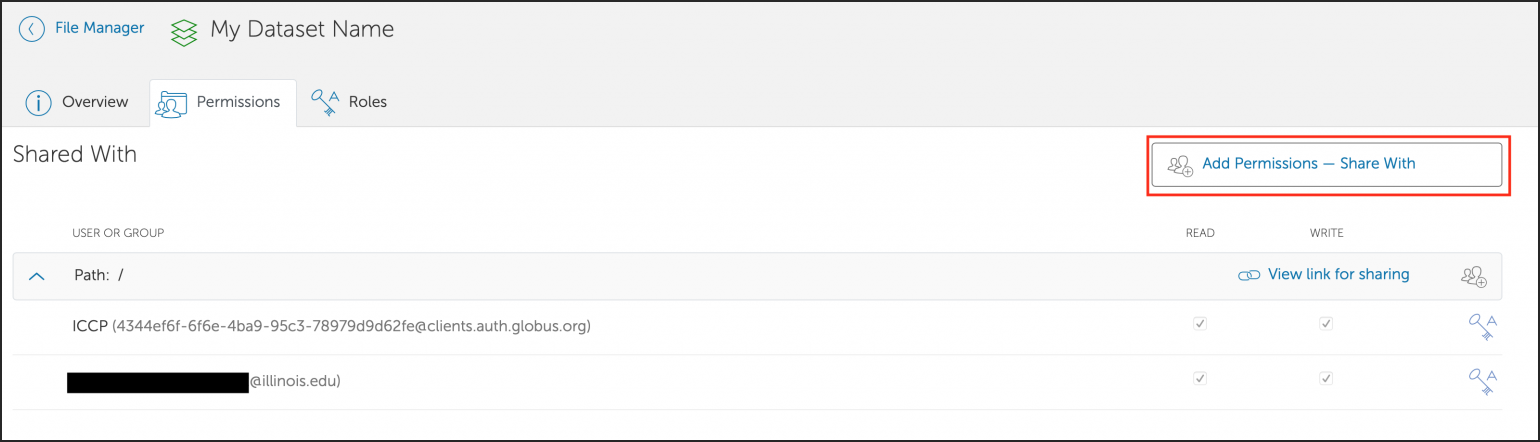
After creating the collection, you will get dropped into the permissions tab for that shared endpoint. Click the “Add Permissions - Share With” button to add people you want to share the data with.
Fill in the share information and click the “Add Permission “ button. You can grant access to a smaller subset of your dataset (using the “Path” field) and choose read or read/write access.
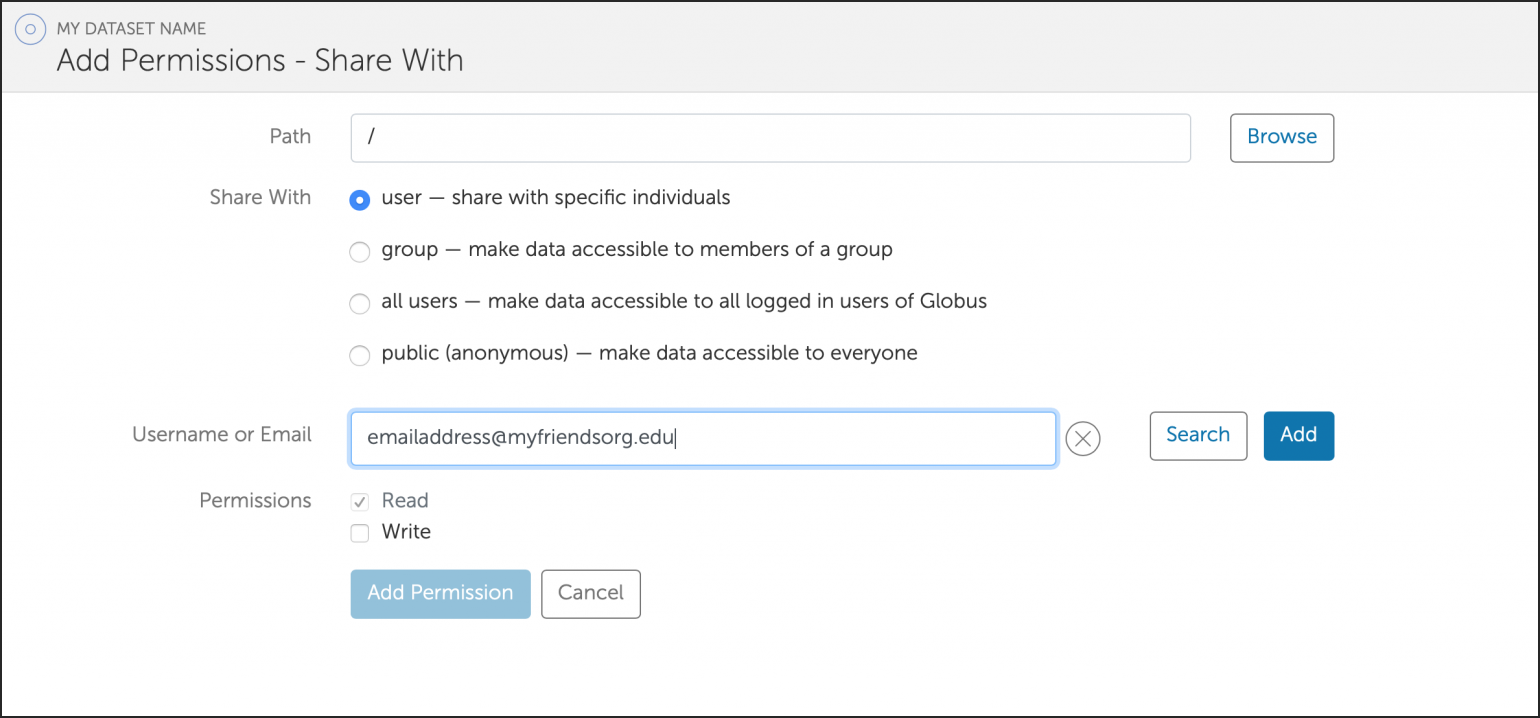
Once added, you should see the person in the “Shared With” section.