JupyterLab Environment
What is a Notebook?
Notebooks are documents that can contain code (like python) and rich text elements (paragraphs, equations, figures, links). You can edit and re-run cells, in place, in a notebook. Notebooks are:
Executable documents that can be run to perform data analysis.
Human-readable documents that can contain the analysis description and results.
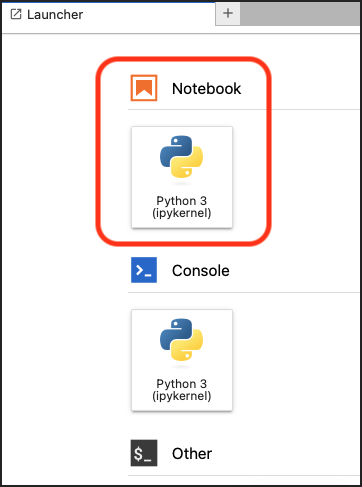
Using a Notebook
In the Launcher window, by default, there is a Python 3 notebook icon that you can use to launch a Python 3 notebook. If you are logged into the R server, there will also be an R notebook icon.
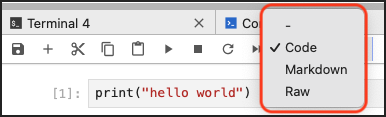
How to Switch Between Code, Markdown, and Raw Inputs
This is how you switch between the Code, Markdown, and Raw input types for a cell in a notebook:
Select the cell you want to modify.
Go to the Select the cell type dropdown menu at the top of the notebook window (the default selection is Code):

In the dropdown menu, select the cell type you want to use:
Edit and Command Modes
Jupyter notebooks have two modes of interaction, edit and command. The mode you are in is shown in the bottom-right corner of your notebook:

Edit Mode
To enter edit mode, click inside a cell.
In edit mode, you can:
Edit the contents of a cell
Command Mode
To enter command mode, press the Esc key or click outside of a cell.
In command mode, you can:
Navigate between cells
Add and delete cells
Change the cell type
Rearrange cells
What is a Console?
Consoles allow you to run code in a kernel.
In consoles, you can:
Display rich text elements from code output.
Edit and re-run code in a new cell.
In consoles, you can’t:
Input rich text elements separate from a code output.
Edit and re-run cells in place.
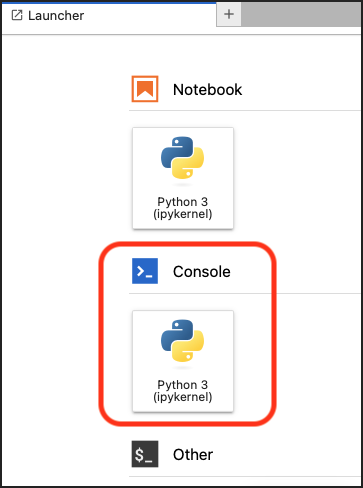
Using a Console
In the Launcher window, by default, there is a Python 3 console icon that you can use to launch a Python 3 console. If you are logged in to the R server, there is also an R console icon.
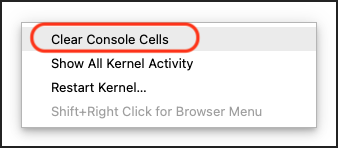
How to Clear the Console
To clear the console without restarting the kernel, right-click inside the console and select Clear Console Cells.
How to Browse Your Input History
Browse your cell input history using your up and down keys inside the console input cell. You can edit and re-run previously run code with this method more quickly than re-typing.
Jupyter Best Practices
These are best practices to keep in mind when using JupyterLab/Jupyter Notebook.
Your entire notebook should run from top to bottom.
In a notebook, go to the Run menu and select Restart Kernel and Run All Cells. Your notebook should run without errors. If there are errors, troubleshoot/resolve them and try again.
Take time to improve your notebook’s readability.
For example, a redundant cell that re-imports a module that was imported in a higher cell, hurts readability.
A readable notebook is easier for you to understand after a hiatus and makes it easier for someone else to help you troubleshoot an issue.
If you copy an existing notebook or code from another source, actively review it before using it (instead of just copying, pasting, and running). Some things to consider are:
Is the code still in active development or has it been abandoned (no longer being maintained)?
For example, fields like machine learning (ML) are changing rapidly. An ML notebook or code that was relevant a few years ago may not be today, if it isn’t being maintained.
Who are the developers? Is there industry backing? Is it a solo developer’s fork of something else?
Understanding the source can help you decide if it will work for your needs or if you should continue to search.
Python Packages
Packages contain code, data, and documentation in a standardized collection format that you can install to perform specific tasks or operations within your code.
Python is a general-purpose programming language. Install packages to perform specific tasks or operations within your code. For example, the Python package NumPy, or numpy in commands, can be used to perform operations on arrays. There are multiple methods you can use to install packages in Jupyter Notebooks.
How to Install Packages
Note
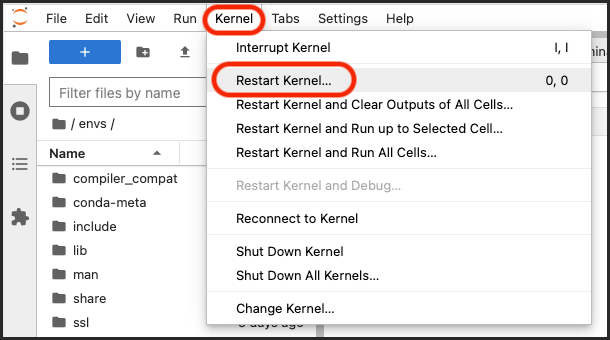
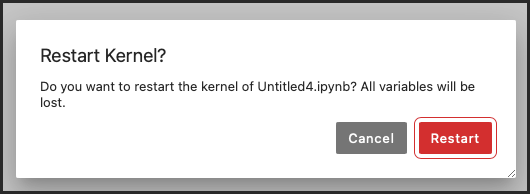
After installing packages in a notebook or console, restart the kernel to ensure the changes take effect. To restart the kernel, click on the Kernel menu and select Restart Kernel….
pip
Install packages directly within a Jupyter Notebook by running the pip install command in a code cell. To install the package numpy:
pip install --user numpy
conda
If you are using the Anaconda distribution of Python, you can use conda install to install packages. Conda is a package manager that simplifies the installation and management of packages and environments. To install the package numpy:
conda install numpy
Magic Commands
Magic commands are built-in Jupyter/IPython commands, you can learn more about magic commands in the IPython documentation. Use the %pip and %conda magic commands in a code cell to install packages. To install the package numpy with %pip or %conda:
%pip install --user numpy
%conda install numpy
Requirements File
If you have a requirements.txt file that lists all the packages you want to install, you can use the %pip magic command with the -r flag to install all the packages at once.
%pip install -r requirements.txt --user
Terminal
JupyterLab provides a terminal within the interface. Open a terminal in the File menu by selecting New and then Terminal. From the terminal, you can use pip install or conda install commands to install packages just like you would in a regular command prompt or terminal.
How to Install Custom Packages
Note
Before installing a custom package, ensure that you have access to the package source. Packages can be obtained from various sources such as Python Package Index (PyPI), GitHub repositories, or local files.
Ensure that any custom packages you install are compatible with your Python version and dependencies to avoid any conflicts or compatibility issues.
Follow these steps to install custom packages in Jupyter Notebooks:
Install a custom package using one of the three methods below:
pip: The most common method for installing custom packages is using pip, the package installer for Python. In a Jupyter Notebook code cell, you can run the following command to install a custom package, such as
numpy, from PyPI:pip install --user numpy
GitHub: If the package is hosted on a GitHub repository, you can use pip to install it directly from the repository. In the code cell, run the following command, replacing
https://github.com/author/package.git@branchwith the actual GitHub repository URL:pip install --user git+https://github.com/author/package.git@branch
local files: If you have the package stored locally, you can install it using pip by specifying the path to the package file. In the code cell, run the following command, replacing
/path/to/package.whlwith the actual path to the package file:pip install --user /path/to/package.whl
Click on the Kernel menu and select Restart Kernel…, to ensure the changes take effect.
Import the package into your Jupyter Notebook code cells using the standard Python import statement. The below example imports
numpy:import numpy as np
List of Installed Packages
To view the list of installed packages, run the pip list command in a notebook, console, or terminal.
pip list Example (click to expand/collapse)
lhelms2@jupyter-lhelms2:~$ pip list
Package                       Version
----------------------------- ------------
alembic                       1.12.0
anyio                         4.0.0
argon2-cffi                   23.1.0
argon2-cffi-bindings          21.2.0
arrow                         1.3.0
asttokens                     2.4.0
async-generator               1.10
async-lru                     2.0.4
attrs                         23.1.0
Babel                         2.12.1
backcall                      0.2.0
backports.functools-lru-cache 1.6.5
beautifulsoup4                4.12.2
bleach                        6.0.0
blinker                       1.6.2
boltons                       23.0.0
Brotli                        1.1.0
cached-property               1.5.2
certifi                       2023.7.22
certipy                       0.1.3
cffi                          1.16.0
charset-normalizer            3.2.0
colorama                      0.4.6
comm                          0.1.4
conda                         23.7.4
conda-package-handling        2.2.0
conda_package_streaming       0.9.0
cryptography                  41.0.4
debugpy                       1.8.0
decorator                     5.1.1
defusedxml                    0.7.1
entrypoints                   0.4
exceptiongroup                1.1.3
executing                     1.2.0
fastjsonschema                2.18.1
fqdn                          1.5.1
greenlet                      2.0.2
idna                          3.4
importlib-metadata            6.8.0
importlib-resources           6.1.0
ipykernel                     6.25.2
ipython                       8.16.0
ipython-genutils              0.2.0
isoduration                   20.11.0
jedi                          0.19.0
Jinja2                        3.1.2
json5                         0.9.14
jsonpatch                     1.33
jsonpointer                   2.4
jsonschema                    4.19.1
jsonschema-specifications     2023.7.1
jupyter_client                8.3.1
jupyter_core                  5.3.2
jupyter-events                0.7.0
jupyter-lsp                   2.2.0
jupyter_server                2.7.3
jupyter_server_terminals      0.4.4
jupyter-telemetry             0.1.0
jupyterhub                    4.0.2
jupyterlab                    4.0.6
jupyterlab-pygments           0.2.2
jupyterlab_server             2.25.0
libmambapy                    1.5.1
Mako                          1.2.4
mamba                         1.5.1
MarkupSafe                    2.1.3
matplotlib-inline             0.1.6
mistune                       3.0.1
nbclassic                     1.0.0
nbclient                      0.8.0
nbconvert                     7.8.0
nbformat                      5.9.2
nest-asyncio                  1.5.6
notebook                      7.0.4
notebook_shim                 0.2.3
oauthlib                      3.2.2
overrides                     7.4.0
packaging                     23.2
pamela                        1.1.0
pandocfilters                 1.5.0
parso                         0.8.3
pexpect                       4.8.0
pickleshare                   0.7.5
pip                           23.2.1
pkgutil_resolve_name          1.3.10
platformdirs                  3.10.0
pluggy                        1.3.0
prometheus-client             0.17.1
prompt-toolkit                3.0.39
psutil                        5.9.5
ptyprocess                    0.7.0
pure-eval                     0.2.2
pycosat                       0.6.4
pycparser                     2.21
pycurl                        7.45.1
Pygments                      2.16.1
PyJWT                         2.8.0
pyOpenSSL                     23.2.0
PySocks                       1.7.1
python-dateutil               2.8.2
python-json-logger            2.0.7
pytz                          2023.3.post1
PyYAML                        6.0.1
pyzmq                         25.1.1
referencing                   0.30.2
requests                      2.31.0
rfc3339-validator             0.1.4
rfc3986-validator             0.1.1
rpds-py                       0.10.3
ruamel.yaml                   0.17.33
ruamel.yaml.clib              0.2.7
Send2Trash                    1.8.2
setuptools                    68.2.2
six                           1.16.0
sniffio                       1.3.0
soupsieve                     2.5
SQLAlchemy                    2.0.21
stack-data                    0.6.2
terminado                     0.17.1
tinycss2                      1.2.1
tomli                         2.0.1
toolz                         0.12.0
tornado                       6.3.3
tqdm                          4.66.1
traitlets                     5.10.1
types-python-dateutil         2.8.19.14
typing_extensions             4.8.0
typing-utils                  0.1.0
uri-template                  1.3.0
urllib3                       2.0.5
wcwidth                       0.2.7
webcolors                     1.13
webencodings                  0.5.1
websocket-client              1.6.3
wheel                         0.41.2
zipp                          3.17.0
zstandard                     0.21.0
Extensions
Use Jupyter extensions to customize or enhance your JupyterLab environment.
How to Install Extensions
Click on the Extension Manger (puzzle piece) icon on the left side of your JupyterLab environment.
If you don’t see the icon, enable the extension manager by going to the Settings menu and selecting Enable Extension Manager.

Click Yes in the feature WARNING pane.

In the DISCOVER pane, browse available extensions.
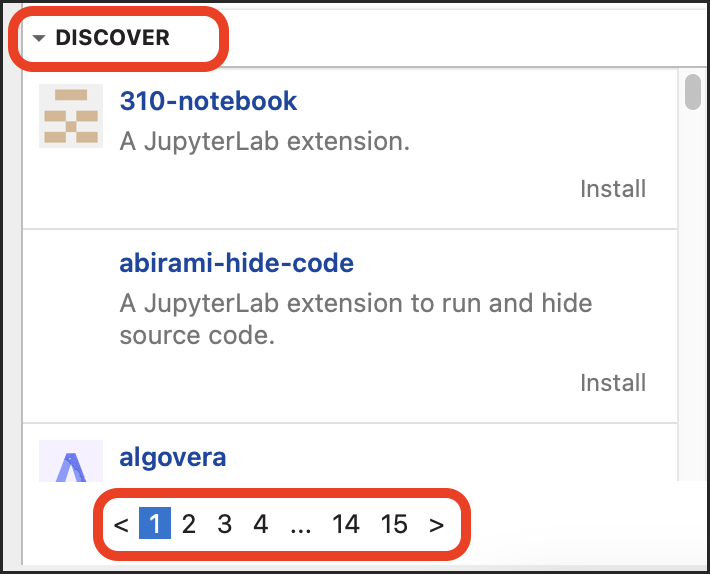
Click Install to install your selected extension.
Refresh your webpage, when prompted.
Warning
This will stop any processes running in your JupyterLab environment.

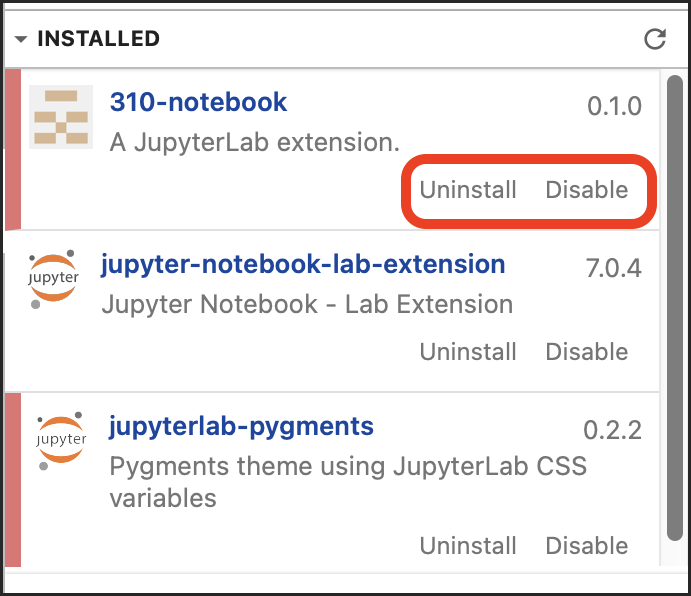
View your installed extensions in the INSTALLED pane. You can also Uninstall or Disable installed extensions from this pane.
Virtual Environments and Custom Kernels
Virtual environments allow you to install packages for projects without having to worry about conflicting dependencies with other packages/versions. You can set up multiple virtual environments with different package sets.
In JupyterLab, you can also use virtual environments to create custom kernels so that you can use your custom package sets in new or existing notebooks.
Create and Set Up a Virtual Environment
These steps show you how to create and set up a virtual environment in JupyterLab. This includes activating the environment and installing packages. If you want to use your virtual environment in a notebook, after these set up steps, continue to Create a Custom Kernel.
Open a JupyterLab Terminal and execute the following
conda createcommand; replaceenv_namewith the name of your virtual environment.conda create --name env_name
Activate your virtual environment with the following
source activatecommand; replaceenv_namewith the name of your virtual environment.source activate env_name
When your virtual environment is activated, your terminal prompt will look like:
(env_name) NetID@jupyter-NetID:~$
For example, a user that set up a virtual environment named
envswould have this terminal prompt:(envs) jdoe1@jupyter-jdoe1:~$Install packages into your virtual environment with
conda install package_name; replacepackage_namewith the name of the package you want to install.For example, to install
numpy:conda install numpy
After you have installed the packages you want in your virtual environment, verify them by executing
conda list.When you want to deactivate your virtual environment, perform one of the following:
Execute
conda deactivate.
Activate another, existing environment with the
source activatecommand from step 2; replaceenv_namewith the name of the virtual environment you want to activate.
Note
If you want to have a virtual environment activated automatically each login, add source activate env_name to your shell configuration (e.g. bashrc, zshrc, etc).
Create a Custom Kernel - Install and Activate ipykernel
After you have a virtual environment set up, you can install ipykernel to use the virtual environment (and the packages you installed in it) in a notebook.
In a Terminal window, verify that your virtual environment is activated. Your terminal prompt should start with
(env_name).If your virtual environment is not activated, execute the following command; replace
env_namewith the name of your virtual environment.source activate env_name
Execute the following
conda installcommand to installipykernel:conda install -c conda-forge ipykernel
Execute the following command; replace
env_namewith the name of your virtual environment.python -m ipykernel install --user --name=env_name
Open a new Launcher window and launch a notebook.
In the notebook open the Kernel menu and select Change kernel.
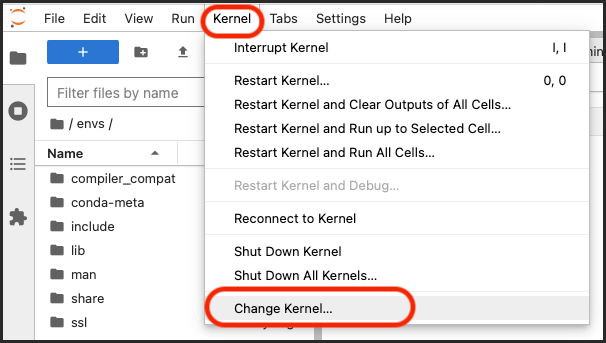
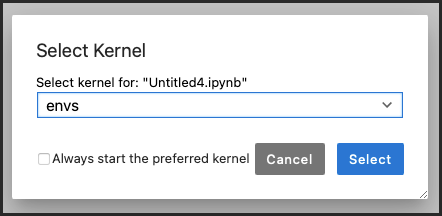
If your new env_name kernel is listed in the drop-down menu, select it.
If your new environment isn’t listed:
Open the Kernel menu and select Restart Kernel.
Open the Kernel menu and select Change Kernel.
Select your env_name kernel from the drop-down menu.