Installed Software
DeltaAI software is provisioned using the HPE Cray Programming Environment (CPE). Select NVIDIA NGC containers are made available (see Containers) and are periodically updated from the NVIDIA NGC site. An automated list of available software can be found on the ACCESS website.
Modules/Lmod
DeltaAI provides HPE/Cray modules and compilers. The functional programming environments are PrgEnv-gnu and PrgEnv-cray. The default environment loads PrgEnv-gnu.
Use module spider package_name to search for software in Lmod and see the steps to load it in your environment.
See also: User Guide for Lmod.
Please submit a support request for help with software not currently installed on DeltaAI. For general installation requests, the DeltaAI project office will review requests for broad use and installation effort.
Python
Note
When submitting support requests for python, please provide the following and understand that DeltaAI support staff time is a finite resource while python developments (new software and modules) are growing at nearly infinite velocity:
Python version or environment used (describe fully, with the commands needed to reproduce)
Error output or log from what went wrong (screenshots are more difficult to work with than text data)
Pertinent URLs describing what you were following/attempting (if applicable), note that URL recipes specific to vendors may be difficult to reproduce when not using their cloud resources (Google Colab, for example)
DeltaAI’s architecture is aarch64 and many python packages may not be built for that, if you cannot find a python wheel then building from source may be the only option. There is no guarantee your desired software can be ported to the new architecture with minimal effort.
TensorFlow is only supported from Nvidia’s NGC container. Python sw stacks that require TensorFlow may be difficult (or impossible) to adapt to DeltaAI. See the notes about it at TensorFlow on DeltaAI.
On DeltaAI, you may install your own python software stacks, as needed.
There are choices when customizing your python setup. If you anticipate maintaining multiple python environments or installing many packages, you may want to target a filesystem with more quota space (not $HOME) for your environments. /scratch or /projects may be more appropriate in that case.
You may use any of these methods with any of the python versions or instances described below (or you may install your own python versions):
venv (python virtual environment)
Can name environments (metadata) and have multiple environments per python version or instance. pip installs are local to the environment. You specify the path when using venv:
python -m venv /path/to/env.conda (or miniforge) environments
Similar to venv but with more flexibility, see this comparison table. See also the miniforge environment option: miniforge. pip and conda installs are local to the environment and the location defaults to
$HOME/.conda. You can override the default location in$HOMEby using the--prefixsyntax:conda create --prefix /path/to/env. You can also relocate your .conda directory to your project space, which has a larger quota than your home directory.pip3:
pip3 install --user <python_package>CAUTION: Python modules installed this way into your
$HOME/.local/will match on python versions. This can create incompatibilities between containers or python venv or conda environments when they have a common python version number. You can work around this by using the PYTHONUSERBASE environment variable. That will also allow for shared pip installs if you choose a group-shared directory.conda-env-mod Lmod module generator from Purdue
The conda-env-mod script will generate a python module you can load or share with your team. This makes it simpler to manage multiple python scenarios that you can activate and deactivate with module commands.
pyenv python version management
Pyenv helps you manage multiple python versions. You can also use more than one python version at once in a project using pyenv.
Note
The NVIDIA NGC Containers on Delta provide optimized python frameworks built for DeltaAI’s H100 GPUs. Delta staff recommend using an NGC container when possible with the GPU nodes (or use one of the conda or miniforge modules).
Python (a recent or latest version)
If you don’t need all the extra modules provided by Anaconda, use the basic python installation provided by Cray or install your own for aarch64.
You can add modules via pip3 install --user <modulename>, setup virtual environments, and customize, as needed, for your workflow starting from a smaller installed base of python than Anaconda.
$ module load cray-python
$ which python
/opt/cray/pe/python/3.11.7/bin/python
cray-python includes: numpy, mpi4py, and pandas .
miniforge3
python/miniforge3_pytorch
Use python from the python/miniforge3_pytorch module if you need some of the modules provided by conda-forge in your python workflow.
See the Managing Environments section of the conda getting started guide to learn how to customize conda for your workflow and add extra python modules to your environment.
Note
If you use conda with NGC containers, take care to use python from the container and not python from conda or one of its environments.
The container’s python should be first in $PATH.
You may --bind the conda directory or other paths into the container so that you can start your conda environments with the container’s python (/usr/bin/python).
The Anaconda archive contains previous Anaconda versions. The bundles are not small, but using one from Anaconda will ensure that you get software that was built to work together. If you require an older version of a python lib/module, NCSA staff suggest looking back in time at the Anaconda site (though this will be a limited timeline due to the new grace-hopper aarch64 in DeltaAI).
Python Environments with conda
See the Conda configuration documentation if you want to disable automatic conda environment activation.
Note
When using your own custom conda environment with a batch job, submit the batch job from within the environment and do not add conda activate commands to the job script; the job inherits your environment.
Batch Jobs
Batch jobs will honor the commands you execute within them. Purge/unload/load modules as needed for that job.
A clean slate might resemble (user has a conda init clause in bashrc for a custom environment):
conda deactivate
conda deactivate  # just making sure
module reset      # load the default DeltaAI modules

conda activate base
# commands to load modules and activate environs such that your environment is active before
# you use slurm ( do not include conda activate commands in the slurm script )

sbatch myjob.slurm  # or srun or salloc
Non-python/conda HPC users would see per-job stderr from the conda deactivate above (user has never run conda init bash):
[arnoldg@gh-login03 ~]$ conda deactivate
bash: conda: command not found
[arnoldg@gh-login03 ~]$

# or

[arnoldg@gh-login03 ~]$ conda deactivate

CommandNotFoundError: Your shell has not been properly configured to use 'conda deactivate'.
To initialize your shell, run

    $ conda init <SHELL_NAME>

Currently supported shells are:
  - bash
  - tcsh
  - zsh

See 'conda init --help' for more information and options.

IMPORTANT: You may need to close and restart your shell after running 'conda init'.
Extending a System Python Module with Your Own Packages
The python/miniforge3_* modules under /sw/user/python/ are a shared,
read-only stack: a tested combination of Python, CUDA, MPI, PyTorch, and
related libraries that every user gets identically. You cannot install
into them, but you do not need to — the recommended workflow is to
layer your own packages on top of the module without modifying it.
Each module sets PYTHONNOUSERSITE=1 at load time, which disables
Python’s user-site-packages mechanism (the
~/.local/lib/pythonX.Y/site-packages/ directory) for the duration of
the load. Without that, a stale ~/.local package from an unrelated
module or Python version could silently shadow the system stack.
The recommended layering recipe is the venv overlay
below — it adds packages to sys.path directly, so
PYTHONNOUSERSITE does not affect it.
Warning
A consequence of PYTHONNOUSERSITE=1 is that pip install --user
appears to succeed but the installed package cannot be imported:
$ pip install --user humanize
Successfully installed humanize-4.15.0
$ python -c "import humanize"
Traceback (most recent call last):
  File "<string>", line 1, in <module>
ModuleNotFoundError: No module named 'humanize'
The files exist on disk under ~/.local/..., but
site.ENABLE_USER_SITE is False so Python never adds ~/.local
to sys.path.
Recommended approach: a venv on top of the base
For the common case — “I want the system PyTorch stack plus a few extra
packages” — create a Python virtual environment with
--system-site-packages set on top of the loaded module:
module load python/miniforge3_pytorch/2.11.0      # or whichever module
conda activate base
python -m venv --system-site-packages /work/nvme/<account>/$USER/myenv
source /work/nvme/<account>/$USER/myenv/bin/activate
pip install humanize lz4                           # or whatever you need
Replace <account> with your allocation directory.
After this, import torch, import numpy, etc. continue to resolve
through the read-only base; import humanize and import lz4
resolve through your venv. To use the venv in a later session, repeat
the module load and source .../bin/activate steps.
If you already use uv (Astral’s faster
pip and venv reimplementation), the same pattern works as a
drop-in. Pin uv to the active Python so the venv inherits the loaded
module’s stack rather than a uv-managed interpreter:
uv venv --python "$(which python)" --system-site-packages \
    /work/nvme/<account>/$USER/myenv
source /work/nvme/<account>/$USER/myenv/bin/activate
uv pip install humanize lz4
Where to put the venv
Filesystem choice does not affect runtime import speed (the heavy
libraries live on /sw regardless), but it does affect environment
creation time and quota usage:
Filesystem |
Create time |
Notes |
|---|---|---|
|
~4.3 s |
Recommended default. NVMe-backed work space — fastest, lowest variance for env creation. |
|
~5.1 s |
Long-lived and backed up. The right choice for envs you want to keep across allocation cycles. |
|
~5.9 s |
~40% slower for env creation and contributes to |
Override a package that’s already in the base
To pin a different version of a package that is already in the base
env (for example, tabulate), use pip install --ignore-installed:
pip install --ignore-installed tabulate==0.8.10
python -c "import tabulate; print(tabulate.__version__, tabulate.__file__)"
# 0.8.10 /work/nvme/<account>/$USER/myenv/lib/python3.12/site-packages/tabulate.py
Without --ignore-installed, pip sees the base copy and refuses to
reinstall. With it, the venv’s site-packages shadows the base on
import.
Multiple projects, one or more base modules
Each project gets its own venv. Switch between them with
source <venv>/bin/activate — activation sets VIRTUAL_ENV and
prefixes the prompt, so the active project is visible, and concurrent
shells with different venvs do not cross-talk.
If your projects share the same base module, one venv per project on top of that module is enough:
module load python/miniforge3_pytorch/2.11.0
conda activate base
python -m venv --system-site-packages /work/nvme/<account>/$USER/projA
python -m venv --system-site-packages /work/nvme/<account>/$USER/projB
If your projects need different base modules (for example, one on
miniforge3_pytorch and another on miniforge3_datascience),
create one venv per project per module — the venv’s bin/python
is a symlink to a specific base interpreter, so it cannot be
re-pointed. Name the directories accordingly:
module load python/miniforge3_pytorch/2.11.0
conda activate base
python -m venv --system-site-packages \
    /work/nvme/<account>/$USER/projA-pytorch-2.11.0

module reset
module load python/miniforge3_datascience/1.0
conda activate base
python -m venv --system-site-packages \
    /work/nvme/<account>/$USER/projB-datascience-1.0
Important
Always re-load the matching module before activating the venv in a
new shell. The venv inherits the loaded module’s
LD_LIBRARY_PATH and other environment variables; activating it
without the module loaded can produce subtle library-resolution
errors at import time.
Alternatives
Use these only when the venv overlay above does not fit your case.
unset PYTHONNOUSERSITE for plain pip install --user
The shortest workaround if you want pip install --user to behave
as it does on a stock Python install — clear the variable after
loading the module:
module load python/miniforge3_pytorch/2.11.0
conda activate base
unset PYTHONNOUSERSITE
pip install --user humanize lz4
This re-enables ~/.local/lib/pythonX.Y/site-packages/ as a user-site
directory, so import will find packages installed there.
Warning
~/.local is shared across every Python module and version on
the system. A package installed against one module’s Python can
silently shadow the system stack when you later load a different
module. Use this only if you load a single module and never mix
it with others; for any other workflow, prefer the venv overlay
above or the redirected-PYTHONUSERBASE recipe below.
conda create --prefix for a self-contained env
Use this when you need a different Python version from the base, or a fully self-contained environment you can move, share, or pin independently of the system module:
module load python/miniforge3_pytorch/2.11.0
conda activate base
conda create --prefix /projects/<account>/$USER/conda/myenv python=3.11 numpy
conda activate /projects/<account>/$USER/conda/myenv
This is roughly 10× slower to create (~50 s vs ~5 s) and 4× heavier on disk per env than the venv overlay, and you do not inherit the base’s PyTorch stack — anything you need must be installed into the new env.
Warning
Vet your ~/.condarc before running conda create --prefix.
A leaked pkgs_dirs: entry from a previous project’s build will
silently disable conda’s hardlink reuse and inflate every env you
create by another factor of four. The next section ships a clean
template that prevents this.
pip install --user with a redirected PYTHONUSERBASE
Use this only if you specifically want pip install --user semantics
(for example, a workflow you’re porting from another site that expects
~/.local layout). You must both unset PYTHONNOUSERSITE and
redirect PYTHONUSERBASE to a per-module-version directory so
packages don’t leak across module loads:
module load python/miniforge3_pytorch/2.11.0
conda activate base
unset PYTHONNOUSERSITE
export PYTHONUSERBASE=$HOME/.local/deltaai/pytorch-2.11.0
pip install --user humanize lz4
python -c "import humanize, lz4; print('ok')"
Re-export PYTHONUSERBASE (with a different per-module-version path)
in any future shell that loads a different module. Without the
per-module isolation, packages built against one module’s Python
version may silently break when you load another. Python’s site.py
auto-discovers PYTHONUSERBASE, so no PYTHONPATH is needed at
runtime.
Recommended ~/.condarc
If you use conda create --prefix (or any conda command beyond
conda activate base), save the following as ~/.condarc. The
trailing comment documents the most common pitfall: a leaked
pkgs_dirs: entry from a prior project that silently forces
cross-filesystem copies, costing ~4× more disk per env.
# Replace <account> with your allocation directory (see `ls /work/nvme/`).

# Default location for new envs. The first writable entry wins for
# `conda create -n <name>`.
envs_dirs:
  - /work/nvme/<account>/${USER}/conda/envs    # NVMe scratch — fastest, purgeable
  - /projects/<account>/${USER}/conda/envs     # project space — long-lived

# Where conda extracts packages before linking them into envs.
# pkgs_dirs MUST be on the same filesystem as envs_dirs, or conda
# copies instead of hardlinking (4× more disk, ~2× slower create).
pkgs_dirs:
  - /work/nvme/<account>/${USER}/conda/pkgs    # match the first envs_dirs entry

channels:
  - conda-forge
channel_priority: strict
solver: libmamba
auto_update_conda: false
always_yes: true

# Pitfall: a leaked pkgs_dirs entry from a previous project — e.g.
#     /work/nvme/<other-account>/.../pkgs
# silently forces cross-filesystem copies for every `conda create`.
# `CONDA_PKGS_DIRS` env var APPENDS to this list rather than replacing
# it, so the leaked entry still wins. Symptom: ~230 MB envs where
# ~56 MB is expected. Fix: keep only your own entries here.
Optionally, in your ~/.bashrc, place pip’s wheel cache on the same
filesystem as your conda envs so pip can hardlink wheels into envs:
export PIP_CACHE_DIR=/work/nvme/<account>/${USER}/pip-cache
Custom Recipes for Python
Custom recipes to “install foo” with Python are available on the system at /sw/user/python/. The README… files describe the recipes. Created to address past user issues, these recipes can be useful references while you work on your own installations. Topics include, but are not limited to:
datascience
pytorch.2.5.0
tensorflowcpu
tensorflow+cuda
cuquantum
torchgeometric+sparse
vLLM
triton-lang
PyTorch
Information on how to set up and run PyTorch.
Quantum Simulation Resources
DeltaAI provides GPU-accelerated quantum simulation frameworks optimized for the GH200 Grace Hopper superchip architecture. Each GH200 GPU has 120 GB of HBM3 memory (about 97 GB usable after driver overhead), enabling state vector simulations up to 33 qubits on a single GPU. Multi-GPU and multi-node workflows extend this to 37+ qubits across multiple nodes.
Note
All quantum modules are conda-based environments. In SLURM batch scripts, include both the
module load and conda activate commands to ensure the environment is fully initialized.
See the batch script examples in each section below.
NVIDIA CUDA Quantum (CUDA-Q)
CUDA-Q is NVIDIA’s framework for hybrid quantum-classical computing. The DeltaAI module includes a native MPI communication plugin compiled against Cray MPICH for multi-node quantum simulation over HPE Slingshot 11.
Loading CUDA-Q:
$ module load python/cuda_quantum/0.14.0
$ conda activate base
$ python -c "import cudaq; print(cudaq.__version__)"
0.14.0
Simulation backends:
nvidia— single-GPU state vector simulation (default)nvidiawithoption="mgpu,fp64"— multi-GPU distributed state vector via MPInvidiawithoption="mqpu"— circuit batching across multiple GPUs (no MPI needed)tensornet— tensor network simulation for large structured circuits
Example: Single-GPU Bell state (click to expand/collapse)
import cudaq

cudaq.set_target("nvidia")

@cudaq.kernel
def bell():
    q = cudaq.qvector(2)
    h(q[0])
    cx(q[0], q[1])

result = cudaq.sample(bell, shots_count=1000)
print(result)
# Expected: roughly 50% |00> and 50% |11>
Example: Single-GPU SLURM batch script (click to expand/collapse)
#!/bin/bash
#SBATCH --account=<account_name>
#SBATCH --partition=ghx4
#SBATCH --nodes=1
#SBATCH --gpus=1
#SBATCH --time=00:10:00
#SBATCH --job-name=cudaq-single

module load python/cuda_quantum/0.14.0
conda activate base
python -u my_circuit.py
Example: Multi-GPU distributed state vector (4 GPUs, 34+ qubits) (click to expand/collapse)
# multi_gpu_cudaq.py
import cudaq

cudaq.mpi.initialize()
cudaq.set_target("nvidia", option="mgpu,fp64")

N = 34  # ~256 GiB (complex128, from fp64) — ~64 GiB per GPU on 4 GPUs

@cudaq.kernel
def ghz(n: int):
    qubits = cudaq.qvector(n)
    h(qubits[0])
    for i in range(1, n):
        cx(qubits[0], qubits[i])

result = cudaq.sample(ghz, N, shots_count=1000)

if cudaq.mpi.rank() == 0:
    print(f"GHZ({N}) distributed across {cudaq.mpi.num_ranks()} GPUs")

cudaq.mpi.finalize()
#!/bin/bash
#SBATCH --account=<account_name>
#SBATCH --partition=ghx4
#SBATCH --nodes=1
#SBATCH --gpus=4
#SBATCH --ntasks=4
#SBATCH --time=00:30:00
#SBATCH --job-name=cudaq-mgpu

module load python/cuda_quantum/0.14.0
conda activate base

srun python -u multi_gpu_cudaq.py
For multi-node jobs (2+ nodes), change the SLURM directives to --nodes=2 --gpus-per-node=4 --ntasks-per-node=4.
The srun command is the same — CUDA-Q’s nvidia-mgpu plugin enumerates the
visible GPUs on each node and assigns one per rank internally. Do not pin ranks
with CUDA_VISIBLE_DEVICES=$SLURM_LOCALID here — pre-pinning before
cudaq.mpi.initialize() prevents the plugin from selecting a GPU and the
launch segfaults on all ranks at multi-node scale.
For more information, see the CUDA-Q documentation.
NVIDIA cuQuantum SDK
The NVIDIA cuQuantum SDK provides GPU-accelerated libraries for quantum simulation: cuStateVec (state vector), cuTensorNet (tensor networks), and cuDensityMat (density matrices). For Qiskit-based workflows, see Qiskit Aer — Aer is provided as a standalone module on DeltaAI.
Loading the cuQuantum environment:
$ module load python/miniforge3_cuquantum/26.01.0
$ conda activate base
$ python -c "import cuquantum; print(cuquantum.__version__)"
26.01.0
Available conda sub-environments:
$ conda env list
base                 * /sw/user/python/miniforge3-cuquantum-26.01.0
pennylane-0.44         /sw/user/python/miniforge3-cuquantum-26.01.0/envs/pennylane-0.44
Note
cuQuantum 26.01.0 changed some Python import paths. If upgrading from 24.11.0 or 25.03.0:
import custatevec→from cuquantum.bindings import custatevecimport cutensornet→from cuquantum.bindings import cutensornetfrom cuquantum import CircuitToEinsum→from cuquantum.tensornet import CircuitToEinsum
PennyLane
PennyLane is a quantum machine learning framework with auto-differentiation and optimized GPU backends. On DeltaAI, PennyLane is available as a standalone module with source-built Lightning backends compiled against Cray MPICH for multi-node support over Slingshot 11.
Available Lightning backends:
lightning.gpu — GPU state vector via cuStateVec (MPI-enabled for multi-GPU)
lightning.tensor — GPU tensor network via cuTensorNet
lightning.kokkos — Kokkos backend (MPI-enabled)
lightning.qubit — CPU state vector
Loading PennyLane:
$ module load python/pennylane/0.44
$ conda activate pennylane-0.44
$ python -c "import pennylane as qml; print(qml.__version__)"
0.44.1
Example: Single-GPU Bell state with lightning.gpu (click to expand/collapse)
import pennylane as qml
import numpy as np

dev = qml.device("lightning.gpu", wires=2)

@qml.qnode(dev)
def bell():
    qml.Hadamard(wires=0)
    qml.CNOT(wires=[0, 1])
    return qml.probs(wires=[0, 1])

probs = bell()
print(f"|00>={probs[0]:.3f}, |01>={probs[1]:.3f}, "
      f"|10>={probs[2]:.3f}, |11>={probs[3]:.3f}")
# Expected: |00>=0.500, |01>=0.000, |10>=0.000, |11>=0.500
Example: Multi-GPU distributed state vector (4 GPUs, 34+ qubits) (click to expand/collapse)
# multi_gpu_pennylane.py
import pennylane as qml
import numpy as np

N = 34  # ~256 GiB (complex128 default) — ~64 GiB per GPU on 4 GPUs
dev = qml.device("lightning.gpu", wires=N, mpi=True)
# For tighter memory budgets, pass c_dtype=np.complex64 — halves
# state vector size at the cost of single-precision amplitudes.

@qml.qnode(dev)
def ghz():
    qml.Hadamard(wires=0)
    for i in range(1, N):
        qml.CNOT(wires=[0, i])
    return qml.probs(wires=range(min(N, 5)))

probs = ghz()
print(f"GHZ({N}) top probabilities: {probs[:3]}")
#!/bin/bash
#SBATCH --account=<account_name>
#SBATCH --partition=ghx4
#SBATCH --nodes=1
#SBATCH --gpus=4
#SBATCH --ntasks=4
#SBATCH --time=00:30:00
#SBATCH --job-name=pl-mgpu

module load python/pennylane/0.44
conda activate pennylane-0.44

srun python -u multi_gpu_pennylane.py
- For more information on PennyLane Lightning backends:
Note
Jobs should be submitted from within the active PennyLane environment with the module loaded. See Python Environments with conda for details on conda environments with batch jobs.
Qiskit Aer
Qiskit Aer is the GPU-accelerated circuit simulator for the Qiskit ecosystem. On DeltaAI, Aer 0.17.2 is provided as a standalone module built on the CUDA 13 toolchain with cuStateVec.
Loading Qiskit Aer:
$ module load python/miniforge3_qiskit_aer/2.4.2
$ conda activate base
$ python -c "import qiskit_aer; print(qiskit_aer.__version__)"
0.17.2
The module bundles Qiskit 2.4.2, the Aer GPU backend, a broad slice of the Qiskit
ecosystem (qiskit-ibm-runtime, qiskit-algorithms, qiskit-machine-learning,
qiskit-optimization, qiskit-experiments, qiskit-dynamics, mthree,
qiskit-serverless, and the qiskit-addon-* family), and mpi4py linked to
Cray MPICH.
To enable Qiskit Aer in Open Ondemand, run the follwing and then launch a new Jupyter notebook in Open Ondemand. Qikit Aer will be available as a selectable kernel.
$ module load python/miniforge3_qiskit_aer/2.4.2
$ conda activate base
$ setup-kernel
Example: Single-node 4-GPU via cuStateVec blocking (up to ~33q) (click to expand/collapse)
The intra-node multi-GPU recipe sets blocking_enable so Aer distributes the
state vector across the four GH200 GPUs without MPI:
from qiskit import QuantumCircuit
from qiskit_aer import AerSimulator

sim = AerSimulator(method='statevector', device='GPU',
                   cuStateVec_enable=True,
                   blocking_enable=True, blocking_qubits=31)

qc = QuantumCircuit(33)
# ... build circuit ...
result = sim.run(qc, shots=1000).result()
The rule of thumb is blocking_qubits = N - 2 — leaves two qubits’ worth of
state per shard so the four shards fit across the four GH200 GPUs with workspace
to spare. A 33-qubit state vector at complex128 (Aer’s default) is 128 GiB total
and completes in ~5 s with this configuration; a 30-qubit circuit completes in
~1.1 s. Lower blocking_qubits to trade speed for memory headroom on the
densest circuits.
Important
Aer’s native MPI-distributed state vector path is broken with the GPU
backend on DeltaAI in 0.17.2 — calls to sim.run() segfault when MPI
world size ≥ 2. For genuine multi-node distributed state vector
simulation, use PennyLane lightning.gpu with
mpi=True. For Qiskit-based parameter sweeps across many nodes,
use the embarrassingly-parallel mpi4py pattern shown below.
Multi-node pattern — mpi4py parameter sweep (click to expand/collapse)
Each MPI rank runs its own independent AerSimulator against a slice
of the parameter grid; mpi4py handles work distribution and result
gather. Aer’s distribution code is never engaged — the pattern works
because the per-rank job is a complete, self-contained simulation.
# mpi_parameter_sweep.py
from mpi4py import MPI
import numpy as np
from qiskit_aer import AerSimulator

comm = MPI.COMM_WORLD
rank = comm.Get_rank()
nranks = comm.Get_size()

# Build the (gamma, beta) parameter grid
grid = [(g, b) for g in np.linspace(0.1, 1.5, 10)
               for b in np.linspace(0.1, 1.5, 10)]

# Each rank claims grid[i] where i % nranks == rank
my_indices = list(range(rank, len(grid), nranks))

sim = AerSimulator(method="statevector", device="GPU",
                   cuStateVec_enable=True)

local = []
for idx in my_indices:
    g, b = grid[idx]
    qc = build_qaoa_circuit(8, gamma=g, beta=b)  # your kernel
    res = sim.run(qc, shots=2048).result()
    local.append((idx, g, b, expectation(res)))

# Gather to rank 0 for aggregation
all_results = comm.gather(local, root=0)
if rank == 0:
    flat = [r for chunk in all_results for r in chunk]
    best = max(flat, key=lambda x: x[3])
    print(f"Best (gamma, beta): ({best[1]:.3f}, {best[2]:.3f})")
The matching SLURM script launches one task per GPU.
--ntasks-per-node=4 --gpus-per-node=4 places one rank in each of
the node’s four NUMA domains (see System Architecture for the GH200
topology), and each rank addresses its local-NUMA GPU via
CUDA_VISIBLE_DEVICES=$SLURM_LOCALID. --cpus-per-task=18 claims
a quarter of a NUMA’s cores per rank — enough for Aer’s light
orchestration-and-MPI CPU side. Raise it (up to 72 per rank) only if a
pre- or post-processing step is CPU-heavy.
#!/bin/bash
#SBATCH --account=<account_name>
#SBATCH --partition=ghx4
#SBATCH --nodes=2
#SBATCH --ntasks-per-node=4
#SBATCH --gpus-per-node=4
#SBATCH --cpus-per-task=18      # 1/4 of a 72-core NUMA per rank
#SBATCH --time=00:15:00
#SBATCH --job-name=aer-mpi-sweep

module load python/miniforge3_qiskit_aer/2.4.2
conda activate base

srun bash -c \
    'CUDA_VISIBLE_DEVICES=$SLURM_LOCALID python -u mpi_parameter_sweep.py'
Multi-GPU quantum scaling
DeltaAI’s pre-installed quantum frameworks support several multi-GPU patterns, each suited to a different workload. This section covers the practical combinations — which framework and backend to choose for distributed state vector circuits, embarrassingly-parallel parameter sweeps, and on-node circuit batching.
State vector memory doubles with each additional qubit. The table
below shows the minimum GPU count to hold the state at the default
precision (complex128). The Aer blocking pattern shown earlier uses
all 4 GPUs of a node by design; PennyLane lightning.gpu and
CUDA-Q nvidia mgpu accept any power-of-2 GPU count that fits.
Qubits |
State vector size |
Minimum GPUs |
|---|---|---|
30 |
16 GiB |
1 |
33 |
128 GiB |
2 (1 node) |
34 |
256 GiB |
4 (1 node) |
35 |
512 GiB |
8 (2 nodes) |
36 |
1 TiB |
16 (4 nodes) |
37 |
2 TiB |
32 (8 nodes) |
Rule of thumb: state vector memory = 2n × 16 bytes at complex128. GH200 HBM3 is about 95 GiB usable per GPU after driver overhead, so a single GPU holds a 32-qubit state at complex128 (~64 GiB used, ~30 GiB margin); spread across 4 GPUs the headroom covers 34 qubits comfortably (~64 GiB per GPU, ~30 GiB margin for swap buffers).
Note
Aer, PennyLane, and CUDA-Q all default to complex128 (double
precision). Switching to complex64 (single precision) halves the
state vector memory — so a 33-qubit state fits on one GPU and a
35-qubit state fits on 4 — at the cost of single-precision
amplitudes. Sampling-heavy and variational workloads usually
tolerate single precision; precise expectation values and deep
circuits where small-amplitude error accumulates may not. Verify
the algorithm in complex128 before dropping to complex64. The
knobs are PennyLane c_dtype=np.complex64, Aer
precision='single', and CUDA-Q option="mgpu,fp32".
Choose a multi-node pattern based on workload type, not just qubit count:
Workload type |
Pattern |
Framework + backend on DeltaAI |
|---|---|---|
Distributed state vector |
One process per GPU; the state is split across ranks via MPI. Cost grows with inter-node MPI traffic — use when the circuit doesn’t fit on a single node. |
PennyLane |
Ensemble / parameter sweep |
One independent simulator per MPI rank; |
Any single-node simulator. See Qiskit Aer for the worked recipe. |
Circuit batching |
One process; CUDA-Q dispatches independent circuit evaluations across the node’s GPUs without MPI. Useful for variational parameter sweeps within a single node. |
CUDA-Q |
Tensor networks |
Single device — memory is independent of qubit count for low-entanglement circuits, so multi-GPU scaling is often unnecessary for circuits that fit this regime. |
PennyLane |
Important
Multi-GPU state vector simulations require a power-of-2 number of GPUs. Start with single-GPU to verify correctness before scaling to multiple GPUs.
Multi-node MPI troubleshooting
Two Cray MPICH environment variables address known multi-node failure modes on the Slingshot 11 / CXI fabric. They are not universal defaults — set them only when the symptom matches.
Important
MPI_Finalize crashes from mismatched CXI counter buffer sizes — set when a
framework creates many MPI communicators (e.g. CUDA-Q nvidia-mgpu inside a
variational loop) and segfaults at finalization:
$ export MPICH_OFI_CXI_COUNTER_REPORT=0
The DeltaAI CUDA-Q modules set this automatically. PennyLane and Qiskit Aer workflows do not typically need it.
Note
process_vm_readv: Operation not permitted errors when MPI ranks share a node
come from Cray MPICH’s Cross-Memory Attach (CMA) intra-node optimization failing
a kernel permission check. Disable CMA single-copy mode and fall back to a
two-copy intra-node transfer:
$ export MPICH_SMP_SINGLE_COPY_MODE=NONE
Performance impact is negligible for quantum workloads where inter-node bandwidth is the bottleneck.
Open OnDemand JupyterLab with Quantum Environments
(first time only) Create a Jupyter kernelspec for the desired environment:
$ module load python/pennylane/0.44
$ conda activate pennylane-0.44
$ setup-kernel
The
setup-kernelcommand creates a kernelspec for the active conda environment and automatically adds environment variable settings needed to avoid runtime linking errors. See How to Customize JupyterLab with conda Environments for more general information on managing kernelspecs for custom conda environments.Refer to JupyterLab for instructions on starting a JupyterLab session from the DeltaAI Open OnDemand Dashboard
TensorFlow
Information on how to set up and run TensorFlow.
Containers
See Containers.
Jupyter Notebooks
Warning
This section is under construction.
Note
The DeltaAI Open OnDemand (OOD) dashboard provides an easy method to start a Jupyter notebook; this is the recommended method.
Go to OOD Jupyter interactive app for instructions on how to start an OOD JupyterLab session.
You can also customize your OOD JupyterLab environment:
Do not run Jupyter on the shared login nodes. Instead, follow these steps to attach a Jupyter notebook running on a compute node to your local web browser:
How to Run Jupyter on a Compute Node
The Jupyter notebook executables are in your $PATH after loading the anaconda3 module. If you run into problems from a previously saved Jupyter session (for example, you see paths where you do not have write permission), you may remove this file to get a fresh start: $HOME/.jupyter/lab/workspaces/default-*.
Follow these steps to run Jupyter on a compute node (CPU or GPU):
On your local machine/laptop, open a terminal.
SSH into DeltaAI. (Replace
<my_delta_username>with your DeltaAI login username).ssh <my_deltaai_username>@gh-login.delta.ncsa.illinois.edu
Enter your NCSA password and complete the Duo MFA. Note, the terminal will not show your password (or placeholder symbols such as asterisks [*]) as you type.
Warning
If there is a conda environment active when you log into DeltaAI, deactivate it before you continue. You will know you have an active conda environment if your terminal prompt has an environment name in parentheses prepended to it, like these examples:
(base) [<gh-login_username>@gh-login01 ~]$

(mynewenv) [<gh-login_username>@gh-login01 ~]$
Run
conda deactivateuntil there is no longer a name in parentheses prepended to your terminal prompt. When you don’t have any conda environment active, your prompt will look like this:[<gh-login_username>@dt-login01 ~]$
Load the appropriate anaconda module. To see all of the available anaconda modules, run
module avail anaconda. This example usespython/miniforge3_pytorch.module load python/miniforge3_pytorch
Verify the module is loaded.
module list
Verify a jupyter-notebook is in your
$PATH.which jupyter-notebook
Generate a
MYPORTnumber and copy it to a notepad (you will use it in steps 9 and 12).MYPORT=$(($(($RANDOM % 10000))+49152)); echo $MYPORT
Find the the
account_namethat you are going to use and copy it to a notepad (you will use it in step 9); your accounts are listed underProjectwhen you run theaccountscommand.accountsRun the following
sruncommand, with these replacements:Replace
<account_name>with the account you are going to use, which you found and copied in step 8.Replace
<$MYPORT>with the$MYPORTnumber you generated in step 7.Modify the
--partition,--gpus,--time, and--memoptions and/or add other options to meet your needs.
srun --account=<account_name> --partition=ghx4 --gpus=1 --time=00:30:00 --mem=32g jupyter-notebook --no-browser --port=<$MYPORT> --ip=0.0.0.0
Copy the last 5 lines returned beginning with: “To access the notebook, open this file in a browser…” to a notepad (you will use this information steps 12 and 14). (It may take a few minutes for these lines to be returned.)
Note these two things about the URLs you copied:
The first URL begins with
http://<ghXXX>.delta...,<ghXXX>is the internal hostname and will be used in step 12.The second URL begins with
http://127.0..., you will use this entire URL in step 14.
Open a second terminal on your local machine/laptop.
Run the following
sshcommand, with these replacements:Replace
<my_deltaai_username>with your DeltaAI login username.Replace
<$MYPORT>with the$MYPORTnumber you generated in step 7.Replace
<ghXXX>with internal hostname you copied in step 10.
ssh -l <my_delta_username> -L 127.0.0.1:<$MYPORT>:<ghXXX>.delta.ncsa.illinois.edu:<$MYPORT> gh-login.delta.ncsa.illinois.edu
Enter your NCSA password and complete the Duo MFA. Note, the terminal will not show your password (or placeholder symbols such as asterisks [*]) as you type.
Copy and paste the entire second URL from step 10 (begins with
https://127.0...) into your browser. You will be connected to the Jupyter instance running on your compute node of Delta.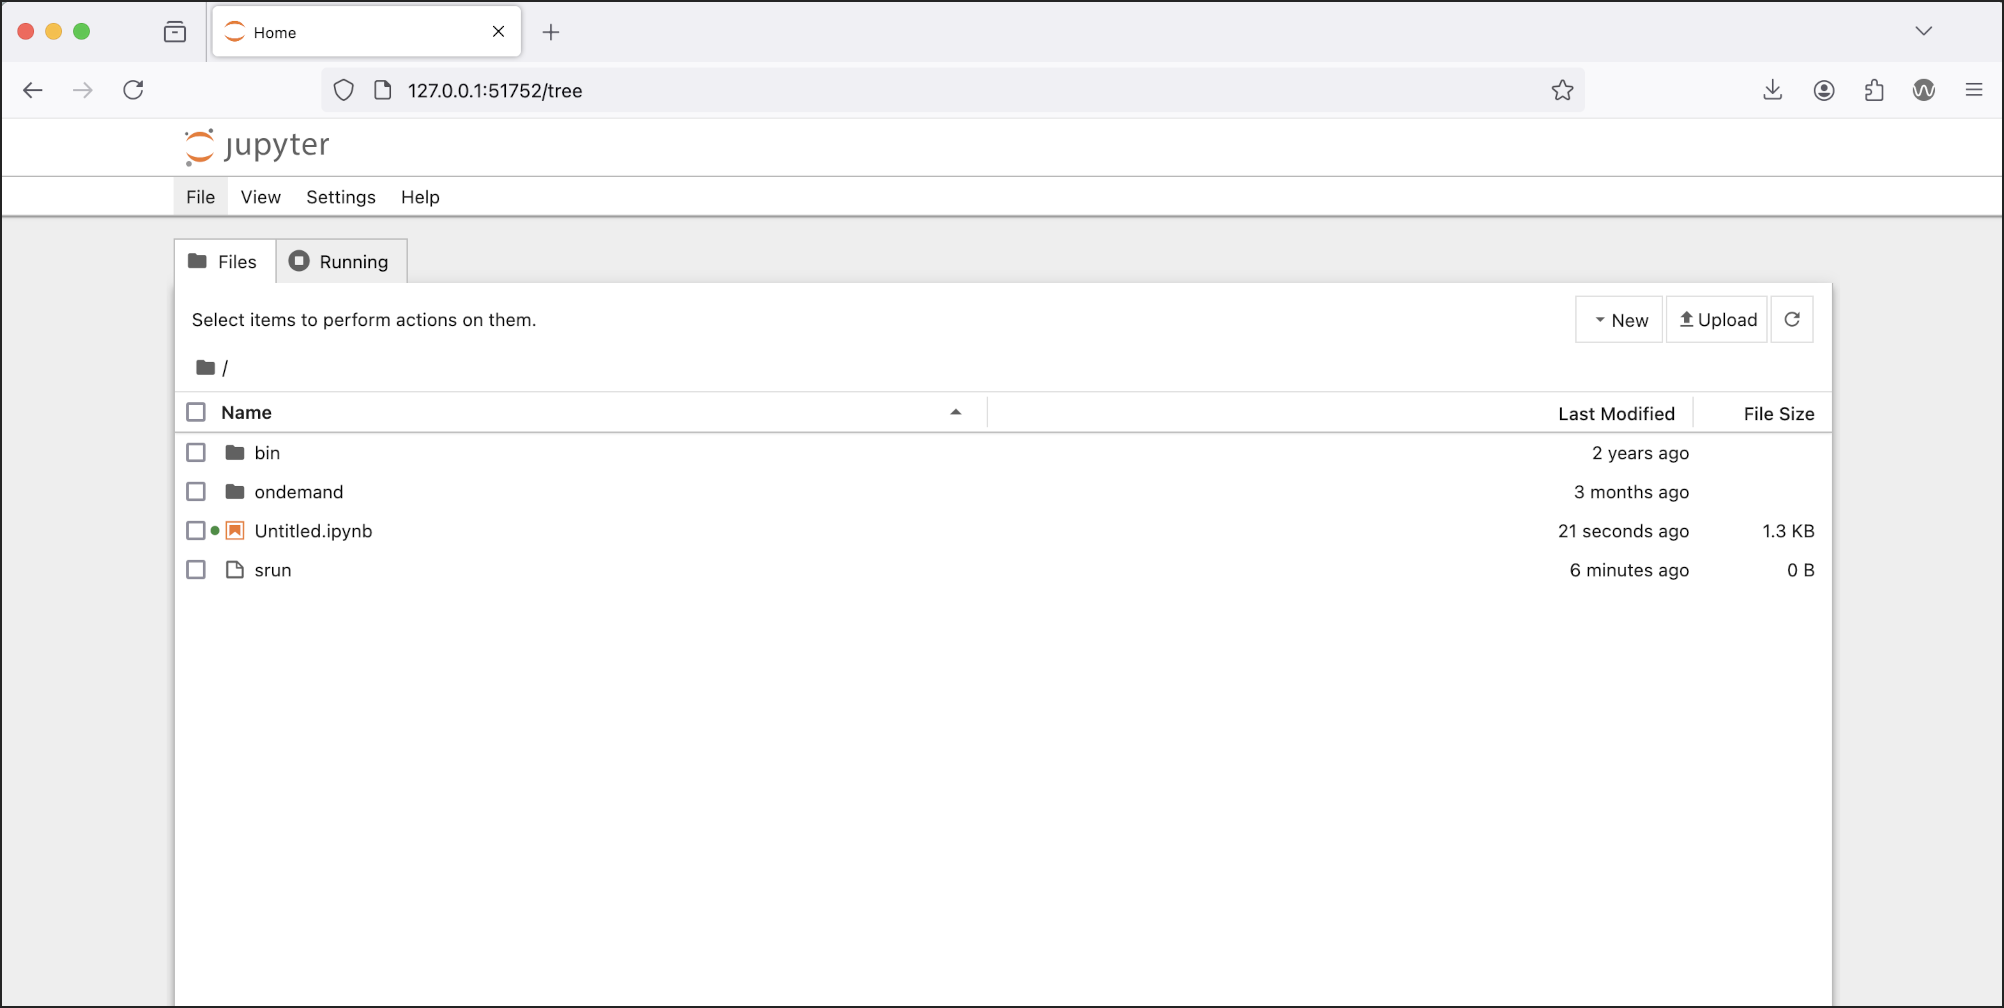
How to Run Jupyter on a Compute Node, in an NGC Container
Follow these steps to run Jupyter on a compute node, in an NGC container:
On your local machine/laptop, open a terminal.
SSH into DeltaAI. (Replace
<my_deltaai_username>with your DeltaAI login username.)ssh <my_delta_username>@gh-login.delta.ncsa.illinois.edu
Enter your NCSA password and complete the Duo MFA. Note, the terminal will not show your password (or placeholder symbols such as asterisks [*]) as you type.
Generate a
$MYPORTnumber and copy it to a notepad (you will use it in steps 6, 8, and 14).MYPORT=$(($(($RANDOM % 10000))+49152)); echo $MYPORT
Find the the
account_namethat you are going to use and copy it to a notepad (you will use it in step 6); your accounts are listed underProjectwhen you run theaccountscommand.accountsRun the following
sruncommand, with these replacements:Replace
<account_name>with the account you are going to use, which you found and copied in step #5.Replace
<project_path>with the name of your projects folder (in two places).Replace
<$MYPORT>with theMYPORTnumber you generated in step 4.Modify the
--partition,--gpus,--time,--mem, and--gpus-per-nodeoptions and/or add other options to meet your needs.
srun --account=<account_name> --partition=ghx4-interactive --gpus=1 --time=00:30:00 --mem=64g --gpus-per-node=1 apptainer run --nv --bind /projects/<project_path> /sw/user/NGC_containers/pytorch_24.07-py3.sif jupyter-notebook --notebook-dir /projects/<project_path> --no-browser --port=<$MYPORT> --ip=0.0.0.0
Copy the last 2 lines returned (beginning with “Or copy and paste this URL…”) to a notepad. (It may take a few minutes for these lines to be returned.)
Modify the URL you copied in step 7 by changing
hostname:8888to127.0.0.1:<$MYPORT>. You will use the modified URL in step 16. (Replace<$MYPORT>with the$MYPORTnumber you generated in step 4.)Open a second terminal.
SSH into DeltaAI. (Replace
<my_deltaai_username>with your DeltaAI login username.)ssh <my_deltaai_username>@gh-login.delta.ncsa.illinois.edu
Enter your NCSA password and complete the Duo MFA. Note, the terminal will not show your password (or placeholder symbols such as asterisks [*]) as you type.
Find the internal hostname for your job and copy it to a notepad (you will use it in step 14).
squeue -u $USER
The value returned under
NODELISTis the internal hostname for your GPU job (ghXXX). You can now close this terminal.Open a third terminal.
Run the following
sshcommand, with these replacements:Replace
<my_deltaai_username>with your DeltaAI login username.Replace
<$MYPORT>with the$MYPORTnumber you generated in step 4.Replace
<ghXXX>with internal hostname you copied in step 12.
ssh -l <my_deltaai_username> -L 127.0.0.1:<$MYPORT>:<ghXXX>.delta.internal.ncsa.edu:<$MYPORT> gh-login.delta.ncsa.illinois.edu
Enter your NCSA password and complete the Duo MFA. Note, the terminal will not show your password (or placeholder symbols such as asterisks [*]) as you type.
Copy and paste the entire modified URL (beginning with
https://127.0...) from step 8 into your browser. You will be connected to the Jupyter instance running on your gpu node of DeltaAI.
List of Installed Software (CPU & GPU)
See: module avail.